A crack in your garage floor is more than just an eyesore; it’s a story about what’s happening underneath your home. The ground beneath us, especially in the Dallas area, is constantly shifting, and your concrete slab has to withstand that movement, temperature swings, and the weight of your vehicles. A successful garage floor crack repair starts with understanding the root cause of the damage. Is it normal settling, or is it a sign of a bigger foundation problem? We’ll break down the main culprits behind cracked concrete and show you how to identify the type of crack you have, so you can choose a solution that lasts and protects your home’s value.
Key Takeaways
- Play Detective with Your Cracks: The type of crack tells you everything. Hairline cracks are often cosmetic, but wide, uneven cracks can signal deeper foundation or soil issues that a simple filler won’t solve.
- Cleanliness is Crucial for DIY Success: For a repair to hold, you must start with a perfectly clean surface. Taking the time to scrub and vacuum out the crack ensures the new sealant will bond properly and last.
- Recognize When to Get an Expert Opinion: Don’t try to patch over serious symptoms. If your floor is sinking, the cracks are getting wider, or one side is higher than the other, it’s time to call a professional for a structural assessment.
Why Is My Garage Floor Cracking?
Finding a crack in your garage floor can be unsettling. Your mind might jump to the worst-case scenario, but don’t panic just yet. Most of the time, concrete cracks are a normal part of a home settling over time. The key is to understand what’s causing the crack so you can figure out the right way to fix it. From the shifting Texas soil beneath your home to the weight of your family car, several factors can contribute to cracks in your concrete.
Understanding the root cause is the first step toward a lasting solution. Some cracks are purely cosmetic, while others might point to a deeper structural issue that needs attention. Before you can choose the right repair method, you need to play detective and identify the culprit. We’ll walk through the most common reasons your garage floor might be cracking, helping you diagnose the problem and decide on your next steps. Whether it’s a simple fix or a sign you need professional concrete repair, getting to the bottom of the issue will give you peace of mind and protect your home’s value. Let’s look at the four main culprits behind those pesky cracks, so you can feel confident about how to handle them.
Soil Movement and Foundation Settling
Here in the Dallas area, our soil has a tendency to expand and contract dramatically with changes in moisture. This constant movement can cause your home’s foundation to shift or settle over time. When the foundation moves, the rigid concrete slab in your garage can crack under the pressure. It’s often just a sign that the concrete has settled, but significant or widening cracks could indicate a more serious issue. If you see other signs like sticking doors or cracks in your interior walls, it might be time to look into foundation repair to address the underlying problem.
Temperature Changes
Concrete, like many materials, expands when it gets hot and shrinks when it cools down. The intense Texas heat and occasional cold snaps create a cycle of expansion and contraction that puts stress on your garage slab. This thermal movement can lead to hairline cracks, especially if the slab doesn’t have enough control joints to accommodate the changes. These cracks are often small and don’t pose a structural threat, but they can get worse over time if they aren’t sealed properly, allowing moisture to seep in.
Heavy Loads
Your garage floor puts up with a lot. It supports the weight of one or more vehicles, heavy tool chests, storage shelves, and maybe even a home gym. All of this weight creates constant pressure on the concrete slab. If the original concrete wasn’t thick enough or didn’t have adequate steel reinforcement, this heavy load can cause stress cracks to form. These cracks often appear where the weight is most concentrated, like under your tires or the legs of heavy shelving units.
Poor Concrete Installation
Sometimes, the problem dates back to the day the concrete was poured. If the concrete mix had too much water, was poured on a poorly prepared base, or wasn’t cured correctly, it can be weaker and more prone to cracking. Large, uneven cracks or areas where the concrete is flaking and crumbling (a problem called spalling) can be signs of a poor installation. When the initial job isn’t done right, you’ll likely see problems appear sooner rather than later. You can see examples of our high-quality work to understand what a professional finish should look like.
What Kind of Crack Is In Your Garage Floor?
Before you can fix a crack in your garage floor, you need to play detective. Not all cracks are the same, and the type you have tells a story about what’s happening with your concrete and the ground beneath it. Identifying the crack is the most important first step because it dictates the right repair method. A hairline crack from concrete curing needs a very different solution than a wide gap caused by a shifting foundation.
Take a close look at the cracks in your garage. How wide are they? Are the edges even or is one side higher than the other? Do they follow a straight line or branch out like a spiderweb? Answering these questions will help you figure out if you’re dealing with a simple cosmetic issue or a sign of a more serious structural problem. Let’s walk through the three most common types of cracks you’ll find.
Hairline Cracks
Hairline cracks are exactly what they sound like: tiny, shallow cracks that are about the width of a hair. You might see them appear in a new garage floor as the concrete cures and shrinks, which is a completely normal process. These cracks are usually just a surface-level issue and don’t indicate a problem with your foundation’s structural integrity. While they aren’t a major concern, it’s a good idea to seal them to prevent water from seeping in and making them larger over time, especially during freeze-thaw cycles. For a lasting fix, our professional concrete repair services can ensure even the smallest cracks are sealed properly.
Wide Structural Cracks
If you see cracks in your garage floor that are wide (over 1/2 inch), deep, or have uneven edges, it’s time to pay attention. These are often structural cracks, and they signal a deeper problem. This type of crack usually means the soil underneath the slab is shifting or your home’s foundation is settling in an unstable way. You might also notice other warning signs in your home, like sticking doors or cracks in your drywall. Ignoring these issues can lead to more significant and costly damage. For cracks this serious, it’s best to consult a professional to diagnose the underlying cause and recommend a permanent foundation repair solution.
Settlement Cracks
Settlement cracks are very common and happen as the ground beneath your garage naturally compacts and settles over time. These cracks can vary in size and often appear in a spiderweb pattern. While some minor settling is normal, ongoing or significant settlement can lead to problems. If you notice these cracks are getting wider or longer, it means the ground is still actively shifting. Monitoring these cracks is key. A stable settlement crack can often be filled to prevent moisture damage, but if you see changes, it’s a sign that your foundation may need support. You can see examples of how we address these issues in our work with other Dallas-area homeowners.
What You’ll Need for DIY Crack Repair
Before you roll up your sleeves, let’s talk about supplies. Like any project, having the right tools and materials on hand makes all the difference between a frustrating afternoon and a job well done. Gathering everything you need beforehand means you can focus on the repair itself without making extra trips to the hardware store. We’ll break it down into two main categories: what you need to stay safe and clean the area, and the actual products you’ll use to fill the cracks.
Safety Gear and Cleaning Supplies
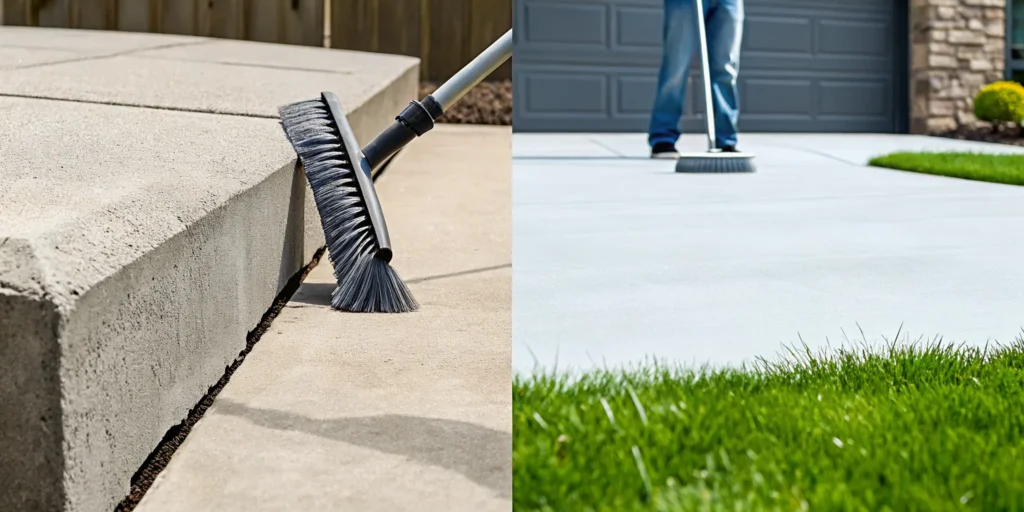
First things first: safety. Always protect yourself with safety glasses and heavy-duty gloves. Concrete dust and repair chemicals are not things you want in your eyes or on your skin. Once you’re geared up, it’s time to clean. A pristine surface is non-negotiable for a lasting repair. You’ll need a wire brush and a stiff-bristled broom or shop vacuum to clear out any debris, loose concrete, and dirt from inside the crack. This step ensures your repair product will bond directly to the solid concrete, creating a much stronger fix.
Repair Products and Tools
The right repair product depends on the size of the crack. For small, hairline cracks, a flexible concrete crack filler or masonry caulk often does the trick. For wider or deeper gaps, you’ll want something stronger, like a two-part epoxy or a polyurethane sealant. Many hardware stores sell DIY kits that come with everything you need. If a crack is deeper than a quarter-inch, press a foam backer rod into it before adding the filler. This saves material and helps the repair hold up better over time. While these products work for minor fixes, significant damage often requires professional-grade concrete repair solutions to address the root cause.
Finding the Best Garage Floor Crack Repair Products
Walking into a hardware store can feel overwhelming with so many products promising the perfect fix. When you’re dealing with your garage floor, choosing the right repair product is the key to a solution that actually lasts. The best choice depends on the type of crack you have, your budget, and how much work you’re willing to put in. Let’s look at some of the most common and effective options out there so you can make a confident decision.
At Solid Base, our professional concrete repair services rely on proven, high-quality materials that you won’t find on the average store shelf. We use these because they offer the best combination of strength and flexibility for a permanent solution.
Our Professional-Grade Concrete Repair Solutions
For a truly durable fix, professionals often turn to high-quality epoxy and polyurethane fillers. These materials are engineered to handle the tough conditions of a garage, from heavy vehicles to fluctuating temperatures. While many DIY kits use epoxy, it’s important to understand its properties. A review of epoxy garage floor coatings explains that epoxy can be rigid and brittle. A more flexible material like polyurea or a specialized polyurethane “moves with the concrete instead of cracking apart.” This flexibility is vital for a long-term repair that can adapt to the natural expansion and contraction of your concrete slab.
Top-Rated Epoxy and Polyurethane Fillers
If you’re going the DIY route, you can still find some excellent products. When you’re shopping, look for polyurethane-based sealants, which offer more flexibility than standard epoxy fillers. For example, a popular choice like the Sika Sikaflex Crack Flex Sealant gets high marks for its performance. One homeowner noted, “I’ve used this for sealing cracks in my concrete driveway. It lasts for years, does a great job.” Products like this are often self-leveling, which makes them easier to apply for a smooth, clean finish. Reading customer reviews is a great way to gauge a product’s real-world durability and ease of use.
Comparing Durability and Cost
While it’s tempting to grab the cheapest option, it might cost you more in the long run. Cheaper patch kits often prioritize a low price over quality materials, leading to repairs that fail quickly. For instance, some reviews for the Quikrete FastSet Concrete Crack Repair mention that the color didn’t match the concrete or that the patch “failed shortly after application.” This is a perfect example of why balancing cost and performance is so important. A slightly more expensive, higher-quality polyurethane or epoxy product will create a much stronger bond and give you a repair that stands the test of time.
Your Step-by-Step Guide to Repairing Garage Floor Cracks
Fixing minor cracks in your garage floor is a manageable weekend project if you have the right tools and a bit of patience. Following these steps will help you achieve a clean, durable repair that protects your floor from further damage. Remember, the key to a lasting fix is in the preparation and using the correct materials for the type of crack you’re dealing with. Let’s walk through the process together.
Step 1: Prep and Clean the Area
Before you can fill a crack, you need to give the repair material a clean, solid surface to bond to. Start by clearing everything away from the damaged area. Then, use a wire brush and a chisel to scrape out any loose concrete, dirt, or old sealant from inside the crack. A shop vacuum is perfect for sucking up all the dust and debris left behind. A thoroughly cleaned surface is the most important step for ensuring your repair holds up over time, so don’t rush this part of the job.
Step 2: Choose the Right Repair Method
Not all cracks are the same, so your repair method will depend on the size of the gap. For hairline cracks, a flexible concrete crack filler or masonry caulk will do the trick. For cracks wider than a quarter-inch, you’ll want a high-strength patching compound. A great pro tip is to insert a foam backer rod into deeper cracks before filling them. This saves material and creates a stronger repair. While DIY products are great for minor fixes, significant damage often requires professional-grade concrete repair solutions to address the underlying cause.
Step 3: Apply the Filler and Let It Cure
With your crack prepped and your product chosen, it’s time to apply the filler. Use a putty knife or trowel to press the material firmly into the crack, making sure it fills the entire void. Smooth the surface so it’s level with the rest of the garage floor. From here, patience is key. You must let the product cure completely according to the manufacturer’s instructions, which could take anywhere from a few hours to a full day. Once it’s fully hardened, you can use a grinder to smooth any rough patches for a seamless finish.
Common DIY Mistakes to Avoid
Taking on a DIY project can be rewarding, but a few common missteps can turn a simple garage floor repair into a recurring headache. Small errors can lead to a fix that doesn’t last, forcing you to redo the work later. The key to a successful repair is avoiding the temptation to cut corners. By understanding where DIY repairs often go wrong, you can approach your project with the confidence needed to get it right the first time. Let’s walk through the most frequent mistakes so you can steer clear of them.
Skipping the Prep Work
It’s tempting to jump straight to filling the crack, but proper preparation is the most critical step for a lasting repair. If you don’t thoroughly clean the crack, the filler won’t bond correctly to the concrete. Any dust, debris, or grease left behind creates a weak spot, causing the repair to fail, peel, or chip away over time. Before opening a sealant, take the time to sweep, vacuum, and scrub the crack until it’s completely clean and dry. A strong fix depends on a clean slate, a non-negotiable part of any professional concrete repair.
Using the Wrong Product for the Job
The aisle of repair products at the hardware store can be overwhelming, and grabbing the wrong one is an easy mistake. Not all fillers are created equal. Some products, like rigid epoxies, are brittle and can crack again as your concrete naturally expands and contracts. For a repair that moves with your concrete, a flexible polyurea sealant is often a better choice. Using the wrong material means the crack can reappear quickly, especially if it’s a structural issue. Deeper, wider cracks may indicate a need for professional foundation repair.
Not Giving It Enough Time to Cure
Patience is key when it comes to concrete repair. After applying the filler, you need to let it cure completely. Curing isn’t just drying; it’s a chemical process where the material hardens and gains its full strength. Rushing this step is a recipe for failure. Driving your car over the patch or walking on it too soon can compromise the bond and undo all your hard work. Always read the product’s instructions and follow the recommended curing time. A properly cured repair is a strong repair, as you can see in examples of our finished work.
When to Call a Professional for Garage Floor Repair
While tackling a DIY project can be incredibly satisfying, some jobs are better left to the experts. Repairing your garage floor is one of those tasks where knowing your limits is key. If you’re looking at a few hairline cracks, you can probably handle it with the steps we outlined above. But if the problem seems more complex, calling a professional is the smartest move you can make. It saves you time, prevents bigger headaches down the road, and ensures the job is done right the first time.
Two clear signs tell you it’s time to put down the tools and pick up the phone: you spot evidence of a much larger issue, or the repair simply feels too big to handle on your own. Ignoring these signs can lead to more extensive and expensive damage, so it’s important to be honest about the scope of the problem. A professional assessment can give you peace of mind and a clear path forward for restoring the safety and integrity of your garage.
You See Signs of a Bigger Problem
A crack in your garage floor isn’t always just a crack. Sometimes, it’s a symptom of a deeper issue. If you notice your garage floor is sinking, crumbling, or heaving in certain spots, it could be a red flag for a serious foundation problem. These issues often stem from shifting soil beneath the slab, which can compromise the structural integrity of your entire home.
Instead of just patching the surface, it’s crucial to address the root cause. A professional can determine if the damage is isolated to the slab or connected to your home’s foundation. Catching these problems early can prevent them from escalating into a major structural crisis, protecting your property value and keeping your family safe.
The Repair Feels Beyond Your Skill Level
It’s important to know when a repair is out of your league. As a general rule, if you’re dealing with cracks that are deep or wider than half an inch, it’s best to consult a professional. These larger cracks often require more advanced techniques and materials to ensure a durable fix. Similarly, if the concrete is shifting, moving, or extremely uneven, a simple filler won’t solve the problem. In these cases, the old slab might need to be removed entirely.
Attempting a complex fix without the right experience can lead to a repair that fails quickly or even makes the problem worse. A professional has the tools and expertise to provide a lasting concrete repair, restoring the look and function of your garage floor.
How to Prevent Future Garage Floor Cracks
After you’ve put in the work to repair your garage floor, the last thing you want is to see new cracks appear. The good news is that a little proactive care goes a long way in keeping your concrete slab in great shape. Preventing future damage isn’t just about avoiding another repair project; it’s about protecting the structural integrity of your garage and your home’s value. By paying attention to a few key factors, you can significantly reduce the risk of future cracks and keep your garage floor solid for years to come.
Manage Water Drainage and Maintenance
Water is one of concrete’s biggest enemies. When it seeps underneath the slab, it can erode the soil base, creating voids that lead to settling and cracking. Make sure your gutters and downspouts direct water far away from your foundation. The ground around your garage should also slope away from the building. Inside, regular maintenance is key. Get into the habit of sweeping weekly and cleaning up spills like oil or chemicals right away. A deeper clean every few months can also prevent grime from breaking down the surface. If you spot tiny new cracks, addressing them early is the best way to prevent a bigger concrete repair job later on.
Be Mindful of Weight and Temperature
Your garage floor is tough, but it isn’t indestructible. Consistently parking heavy vehicles, especially large trucks or RVs, in the same spot can put immense stress on the concrete over time. The same goes for storing extremely heavy equipment. Just as important are temperature swings. The Dallas climate can cause concrete to expand in the heat and contract in the cold. This constant movement creates stress that can result in cracking, especially if the original installation didn’t include enough control joints. These issues can sometimes point to deeper problems with the soil beneath your home, which may require a professional foundation inspection.
Related Articles
- How to Fill Large Cracks in Concrete Like a Pro
- Foundation Repair Cost: The Ultimate 2026 Guide
- Ultimate Guide to Foundation Repair Options
Frequently Asked Questions
How can I tell if a crack is just cosmetic or a sign of a serious foundation issue? Look at the crack’s characteristics. Small, hairline cracks that don’t change over time are usually just from the concrete settling or curing. However, if a crack is wider than a quarter-inch, has one side higher than the other, or is actively growing, it’s a red flag. Also, pay attention to other signs in your home, like doors that stick or new cracks in your interior walls, as these often point to a deeper foundation problem that needs a professional look.
Is it expensive to get my garage floor cracks professionally repaired? The cost really depends on the cause and extent of the damage. Filling a few simple settlement cracks is a relatively straightforward and affordable job. However, if the cracks are a symptom of a significant foundation issue that requires stabilization, the cost will be higher. We provide free estimates, so you can get a clear understanding of the scope of the work and the investment required before making any decisions.
Can I really prevent my garage floor from ever cracking? While you can’t completely eliminate the risk of cracks, especially with the shifting soil here in Texas, you can definitely minimize it. The most important step is managing water around your home. Ensure your gutters and grading direct water away from the foundation. Also, try to avoid placing extremely heavy, concentrated loads on the slab. Regular maintenance and sealing small cracks as soon as they appear will also go a long way in preventing them from becoming larger problems.
How long does a professional garage floor repair usually take? The timeline for a repair varies with the job’s complexity. A simple crack filling or sealing project can often be completed in just a few hours. If the repair involves more intensive work, like addressing underlying soil issues or foundation support, it could take a day or more. We always aim to work efficiently to minimize disruption and will give you a clear timeline for your specific project during our assessment.
If I see a crack, does that automatically mean my foundation is failing? Not at all. Most minor cracks in a garage floor are completely normal and are caused by the concrete curing or minor settlement. It’s a common homeowner worry, but a single crack is rarely a sign of a failing foundation. The time to be concerned is when you see multiple, large cracks, uneven surfaces, or other related issues inside your home. A professional inspection is the best way to get a definitive answer and peace of mind.