
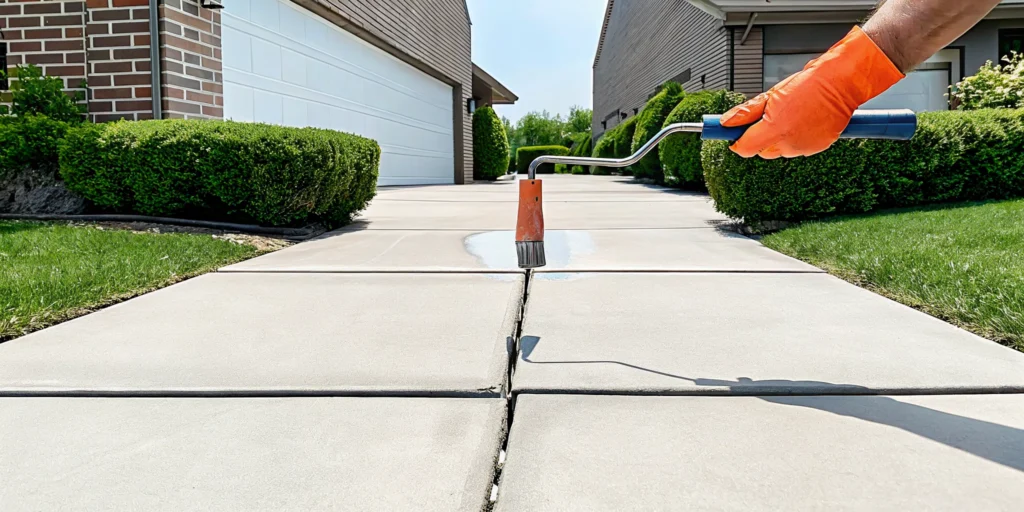
A crack in your driveway is more than just an ugly blemish; it’s a story about what’s happening beneath the surface. While your first instinct might be to fill it and forget it, a lasting fix requires a bit of detective work. Is the crack from simple surface stress, or is it a symptom of shifting Texas soil or poor drainage? Understanding the root cause is the most critical step. This guide will not only teach you how to repair cracked driveway concrete with a step-by-step process but will also empower you to read the warning signs. We’ll help you diagnose the problem so you can confidently decide if a DIY patch is the right move or if it’s time to call an expert for a more permanent solution.
Key Takeaways
- Read the Cracks First: The size and shape of a crack tell a story; hairline cracks are often a simple DIY fix, while wide, uneven, or spiderweb cracks point to serious underlying problems that a patch job will not solve.
- A Clean Start is Crucial for DIY: For a repair to last, you must begin with a perfectly clean and prepped surface. Skipping this step or using the wrong filler material almost guarantees the crack will reappear.
- Uneven Concrete is a Professional’s Job: If one part of your driveway is sinking or heaving, put down the DIY tools. Uneven slabs are a clear sign of foundational issues with the soil, requiring an expert for a stable, long-term solution.
What’s Causing Your Driveway to Crack?
Seeing a new crack in your driveway can be frustrating, but it’s a super common issue for homeowners. Before you can find a lasting fix, you need to play detective and figure out what’s causing the damage in the first place. Most driveway cracks can be traced back to a few usual suspects: the soil underneath, water, heavy weight, and weather.
Understanding the root cause is the most important step. Sometimes, it’s a simple issue you can address yourself. Other times, a crack can be a red flag for a more serious problem lurking beneath the surface. Let’s walk through the main reasons your concrete might be cracking, so you can get a better idea of what you’re dealing with.
Soil movement and settling
The ground under your driveway isn’t as static as you might think, especially here in Texas. Much of the soil in the Dallas area is expansive clay, which acts like a sponge. It swells up when it gets wet and shrinks dramatically when it dries out. This constant cycle of expansion and contraction causes the ground to shift and settle unevenly. Your rigid concrete slab can’t flex with this movement, so the stress builds up until the concrete cracks. If you’re seeing similar issues around your home, it could be a sign of a larger problem with your foundation.
Poor drainage
Water is a major culprit when it comes to concrete damage. If your property has poor drainage, rainwater can pool on or around your driveway. This water can seep underneath the slab, saturating the soil and causing the heaving and settling we just talked about. An improperly prepared base during construction can also leave voids under the concrete where water collects. This weakens the support system for the slab, and eventually, the concrete will crack under the pressure. A proper concrete repair job often involves fixing these underlying water issues to prevent future cracks.
Heavy loads and surface stress
Your driveway is designed to handle the weight of everyday cars, but it has its limits. Consistently parking very heavy vehicles, like a large work truck, an RV, or a boat, can put too much pressure on the slab. The stress is even greater if you have a delivery truck or a dumpster parked on it during a renovation project. This excessive weight can easily cause the concrete to crack, especially if the soil support underneath is already weak or uneven. Think of it as asking the concrete to carry a load it was never built to support.
Freeze-thaw cycles
While our winters aren’t as harsh as in other parts of the country, we get enough freezing nights in the Dallas-Fort Worth area for the freeze-thaw cycle to cause real damage. Here’s how it works: water seeps into tiny, existing cracks in your driveway. When the temperature drops, that water freezes and expands, acting like a tiny wedge that forces the crack wider. When it thaws, more water gets into the now-larger gap, and the cycle repeats itself. Over time, this process can turn a hairline crack into a significant problem that compromises the integrity of your entire driveway.
How to Assess Your Driveway Cracks
Before you can fix a crack, you need to play detective. The size, shape, and number of cracks in your driveway tell a story about what’s happening underneath the surface. Taking a moment to properly assess the damage helps you choose the right repair method and decide if it’s a job you can handle yourself or if it’s time to call in a pro. Grab a tape measure and let’s take a closer look at what your driveway is telling you.
Small cracks (under ¼ inch)
These are the tiny, hairline fractures you might notice spreading across the surface. Generally, cracks less than a quarter-inch wide are more of a cosmetic issue than a structural emergency. They are often caused by the concrete shrinking as it cures or by minor surface stress. For these small annoyances, a DIY repair is usually a good option. You can clean the crack thoroughly with a wire brush and then apply a flexible concrete caulk or sealant. This simple fix helps prevent water from seeping in and making the crack worse over time, keeping your driveway looking its best.
Medium cracks (¼ inch to ½ inch)
When cracks grow to between a quarter-inch and a half-inch wide, they require a bit more attention. As long as the concrete slabs on either side of the crack are still level, you can likely tackle this repair yourself. The key is to give the new patching material a solid base to adhere to. You’ll want to carefully chisel out any loose debris along the edges of the crack, creating a reverse “V” shape that’s wider at the bottom. After cleaning out all the dust, you can fill it with a concrete patching compound, which provides a more durable fix than a simple sealant.
Large or structural cracks (over ½ inch)
If you’re looking at a crack wider than a half-inch, it’s time to pause and put down the DIY tools. Cracks of this size, especially if the concrete is uneven, sunken, or heaving, are serious red flags. They often signal a deeper problem, like significant soil movement or issues with the sub-base beneath your driveway. Simply filling a large, structural crack is like putting a bandage on a broken bone; it doesn’t fix the underlying issue. This is the point where seeking professional concrete repair is your best move to ensure a safe and lasting solution.
Key warning signs to look for
Beyond just width, there are other warning signs that point to a bigger problem. Are you seeing a network of cracks that look like a spiderweb? This pattern, known as alligator cracking, almost always indicates a failure in the base layer under the concrete. Another major sign is when cracks keep coming back in the same spot, even after you’ve repaired them. This means the underlying cause, like poor drainage or soil settlement, hasn’t been addressed. When you see these issues, it’s wise to consult with experienced professionals who can diagnose the root cause and prevent further damage.
Gather Your Tools and Materials
Before you can tackle those cracks, you need to get your supplies in order. Having everything on hand before you start will make the process go much smoother. Think of it like prepping your ingredients before you start cooking; it just makes life easier. The tools you’ll need depend on the size of the cracks you’re dealing with. A tiny hairline crack requires a different approach than a wider, more stubborn one. We’ll break down what you need for both small and large repairs, plus the safety gear that is non-negotiable for any concrete work.
For small crack repairs
If you’re dealing with hairline cracks (less than ¼ inch wide), you’re in luck. The fix is relatively simple. You can create a slurry using Portland cement and water. Just mix the two until you get a paste-like consistency. This mixture is perfect for filling in those tiny fissures and restoring a smooth surface to your driveway. Along with the cement, you’ll want a wire brush to clean out the crack, a small trowel or putty knife to apply the slurry, and a bucket for mixing. It’s a straightforward toolkit for a quick and effective fix.
For large crack repairs
Wider cracks demand a bit more muscle and more robust materials. For these, you’ll need a dedicated concrete repair mix or a concrete patching compound. These products are designed to fill larger gaps and create a durable, long-lasting bond. You’ll also need a hammer and chisel to widen the base of the crack into a V-shape, which helps the new material lock in place. A shop vac or stiff brush is essential for cleaning out all the debris. For deeper cracks, a foam backer rod is a great tool to have; you push it into the crack to create a base for the filler, ensuring you don’t waste material. If these cracks seem overwhelming, it might be a sign of a deeper issue requiring professional concrete repair.
Essential safety gear
This part is not optional. Working with concrete can be messy and hazardous, so protecting yourself is key. Always wear safety glasses or goggles to shield your eyes from flying debris when you’re cleaning or chiseling the cracks. You’ll also want a pair of heavy-duty gloves, as wet cement can be caustic and cause skin irritation. If you’re creating a lot of dust, a dust mask is also a good idea. Taking these simple precautions ensures your DIY project is a safe one from start to finish.
How to Repair Your Cracked Driveway, Step by Step
Ready to tackle that cracked driveway? With the right tools and a bit of patience, you can handle many common concrete cracks yourself. This step-by-step guide will walk you through the process for a clean, durable repair that will have your driveway looking much better. Before you start, remember that this guide is for smaller, surface-level cracks. If you’re looking at large, deep, or uneven cracks, it’s often a sign of a deeper issue, like soil settlement or drainage problems. In those cases, a simple patch job won’t last, and you’ll likely need professional concrete repair to address the root cause.
For the smaller stuff, though, a DIY approach can be very effective. Following these five steps carefully will help you achieve a repair that not only looks good but also protects your driveway from further damage. We’ll cover everything from cleaning the crack properly to choosing the right materials and giving your repair the best chance to last. So, roll up your sleeves, gather your supplies, and let’s get that driveway back in shape.
Step 1: Clean and prep the crack
First things first, you need a clean slate. Any dirt, debris, or old, crumbling concrete left in the crack will prevent your new repair material from sticking properly. Start by using a wire brush and a screwdriver or chisel to scrape out any loose bits from inside the crack. A pressure washer can be a great tool here, but a stiff brush and hose will also work. Your goal is to get down to solid, stable concrete. Once it’s clean, let the area dry completely before you move on. This prep work is the most important step for a repair that lasts, so don’t rush it.
Step 2: Choose the right repair material
Next, you’ll need to pick your patching material, and this isn’t a one-size-fits-all situation. For very thin, hairline cracks (less than 1/4 inch), a flexible concrete crack sealant that comes in a caulk tube is usually your best bet. For wider or deeper cracks, you might need a thicker, sand-based concrete patch compound. Read the product labels carefully to find the right match for your specific crack size and type. Choosing the right material is key to ensuring the repair can flex with the concrete and withstand changing weather, so take a moment to assess what you’re working with before you buy.
Step 3: Insert a backer rod for wider cracks
If you’re working with a crack that’s wider than 1/4 inch, don’t just fill the entire thing with sealant. Instead, grab a foam backer rod. This flexible foam rope is designed to be pushed into the crack before you apply the filler. It saves you from using an entire tube of sealant on one crack and, more importantly, it provides a solid base for the sealant to sit on. Gently push the backer rod into the crack until it’s about 1/2 inch below the driveway surface. This creates the ideal depth for the sealant, allowing it to form a strong, flexible bond that can handle movement.
Step 4: Fill and seal the crack
Now it’s time to fill. If you’re using a sealant in a caulk tube, cut the tip at an angle and load it into a caulk gun. Apply a steady bead of sealant into the crack, making sure you fill it from the bottom up to avoid air bubbles. If you’re using a patch compound, use a putty knife or small trowel to press the material firmly into the crack. You want to slightly overfill the crack just a little, as some materials can shrink as they dry. The goal is to create a complete seal that will keep water out for good and prevent the crack from getting worse.
Step 5: Smooth, cure, and seal the surface
For the final step, you’ll smooth out the repair for a professional-looking finish. Use a putty knife or trowel to flatten the sealant or patch compound, making it level with the surrounding driveway surface. Feather the edges to help it blend in. Now comes the hardest part: waiting. You must let the patch cure completely according to the manufacturer’s instructions, which can take 24 hours or more. Don’t drive or walk on it until it’s fully set. Once cured, consider applying a concrete sealer to the entire driveway to protect your new repair and prevent future cracks.
Common DIY Concrete Repair Mistakes to Avoid
Taking on a DIY project can be incredibly rewarding, but a few common missteps can turn a simple fix into a bigger headache. When it comes to concrete, how you do the repair is just as important as what you use. Let’s walk through some of the most frequent mistakes homeowners make so you can get a durable, long-lasting result the first time around.
Skipping surface preparation
It’s tempting to jump right into filling the crack, but skipping the prep work is a recipe for failure. Before you apply any repair material, the area needs to be completely clean. Any dirt, dust, or loose concrete bits left behind will prevent the new filler from bonding properly, causing the repair to crumble and fail quickly. Use a wire brush and a shop vac to clear out all debris. For wider cracks, you can even chisel the edges into a V-shape. This gives the repair material more surface area to grab onto, creating a much stronger hold.
Using the wrong filler material
Walking down the hardware store aisle, you’ll see a lot of different options for concrete filler. Grabbing the first one you see is a common mistake. Different products are designed for different types of cracks. A flexible sealant is great for small, hairline cracks that might expand and contract with temperature changes. A cement-based patching compound, on the other hand, is better for wider, deeper gaps. Using the wrong material can lead to a weak patch that cracks again in no time. If you’re unsure what your driveway needs, our team is experienced in professional concrete repair and can identify the perfect solution.
Repairing in extreme temperatures
Did you know that weather can make or break your concrete repair? Most repair products have an ideal temperature range for application, typically between 40°F and 90°F. If it’s too hot, the filler can dry too quickly before it has a chance to cure and bond correctly. If it’s too cold, the curing process can stall completely, leaving you with a soft, weak patch. Always check the forecast and the product label before you start. It’s best to work on a mild day and out of direct sunlight to give your repair the best chance of success.
Ignoring the root cause of the crack
A crack in your driveway is often a symptom of a deeper issue. While filling it might fix the cosmetic problem for a while, the crack will likely return if the underlying cause isn’t addressed. Common culprits include soil shifting under the slab, poor drainage causing water to pool and erode the base, or even tree roots pushing from below. If you notice your cracks getting wider, slabs becoming uneven, or water pooling around your driveway, you may be dealing with more than surface-level damage. These are signs that you might need a professional foundation repair assessment to solve the problem for good.
Assuming the repair is permanent
Even a perfectly executed DIY repair might not be a permanent solution. Driveways endure a lot, from the weight of vehicles to changing weather. Over time, small movements and stresses can cause new cracks to form or old ones to reappear. It’s helpful to think of concrete care as ongoing maintenance rather than a one-and-done fix. Keep an eye on your repairs and be prepared to touch them up as needed. For a truly long-term solution to significant cracking or sinking, a professional repair using commercial-grade products and equipment often provides the most durable results. You can see examples of our lasting fixes in our work gallery.
When to Call a Professional for Concrete Repair
While I’m a huge fan of rolling up your sleeves for a good DIY project, some jobs are simply better and safer in the hands of a professional. When it comes to your driveway, knowing when to call for backup can save you a lot of time, money, and future headaches. Certain types of damage are more than just cosmetic flaws; they’re warning signs of deeper, more serious issues with the soil or the slab’s foundation.
Ignoring these signs or attempting a quick fix can lead to bigger problems down the road. If you spot any of the following issues with your driveway, it’s a smart move to get an expert opinion. A professional can diagnose the root cause of the cracking and recommend a lasting concrete repair solution that protects your property’s value and safety.
Cracks wider than ½ inch
Once a crack in your driveway grows wider than half an inch, it’s no longer a simple DIY fix. A gap this large is a clear signal that there’s significant movement or stress affecting the slab. These wide cracks act like open invitations for water to seep deep beneath the concrete, which can erode the soil base and lead to even more instability and damage. Simply filling a crack this size with a standard sealant won’t solve the underlying problem. A professional will need to assess why the crack formed and use specialized methods to ensure a durable, long-term repair.
Uneven, sunken, or lifted slabs
If you notice that one section of your driveway is higher or lower than the adjacent one, you’re looking at a serious structural issue. Sunken or lifted concrete is a telltale sign that the soil underneath has shifted, settled, or washed away, leaving the slab without proper support. This not only looks bad but also creates a dangerous trip hazard for your family and guests. Professionals use techniques like poly-jacking to lift and level the concrete, addressing the void underneath and stabilizing the slab without needing to replace it entirely.
Spiderweb or interconnected crack patterns
A network of fine, interconnected cracks that looks like a spiderweb is a major red flag. This pattern, often called “alligator cracking,” indicates that the concrete’s sub-base has failed and can no longer support the weight of the slab. It’s a sign of widespread structural weakness, not just an isolated issue. Trying to seal these numerous cracks one by one is an inefficient and temporary fix. An expert needs to investigate the stability of the ground beneath and determine the best course of action, which you can see in examples of our work.
Drainage problems around the driveway
Water is one of the biggest enemies of a healthy concrete driveway. If you see water pooling on the surface or notice that the ground around your driveway is constantly soggy, you have a drainage problem. Proper grading should direct water away from the slab, but when it doesn’t, that water can saturate the soil, causing it to expand, contract, or wash away. This constant moisture and soil movement will inevitably lead to cracks and settling. A professional can evaluate your property’s drainage and grading to offer a comprehensive solution that protects your driveway from future water damage.
Recurring cracks after repeated repairs
Have you found yourself repairing the same crack over and over again? If a crack keeps reappearing no matter how many times you patch it, it’s a clear sign that you’re only treating a symptom, not the cause. Recurring cracks mean there’s an ongoing issue, like persistent soil movement or pressure from tree roots, that a simple filler can’t handle. Instead of spending more time and money on temporary fixes, it’s time to let a professional diagnose the persistent problem. Getting an expert evaluation can finally put an end to the cycle of repairs.
Related Articles
Frequently Asked Questions
Can I just ignore tiny hairline cracks? It’s tempting to overlook them, but even the smallest cracks can become big problems. Think of a hairline crack as a tiny doorway for water. Once water gets in, it can freeze and expand, forcing the crack wider. It can also seep into the soil base beneath your driveway, weakening its support. Taking a few minutes to seal a small crack now is one of the easiest ways to prevent a much larger, more expensive repair in the future.
Why can’t I just use a simple filler for a large, uneven crack? Using a basic filler on a large, structural crack is like putting a bandage on a broken bone. It might cover the visual problem for a short time, but it does nothing to fix the real issue, which is likely unstable soil beneath the slab. The crack will almost certainly reappear, and you’ll still have an uneven surface that’s a trip hazard. A professional repair addresses the root cause, often by stabilizing the ground itself, to provide a safe and lasting solution.
How do I know if my driveway cracks are a sign of a bigger foundation problem? This is a great question, as your driveway and home foundation often rest on the same Texas soil. Look for other clues around your property. Are you seeing similar cracks in your garage floor or on the exterior brick of your house? Do you have doors that stick or cracks appearing in your interior drywall? If your driveway cracks are accompanied by any of these other signs, it’s a strong indicator that you may be dealing with a larger soil settlement issue that needs a professional evaluation.
Is it really necessary to chisel out the crack before filling it? Yes, this step is crucial for a repair that actually lasts. Most cracks have straight, vertical sides. If you just pour filler in, there’s nothing for it to grip, and the patch can pop out easily. By chiseling the crack into a reverse “V” shape (wider at the bottom than the top), you create a mechanical lock. The patching material fills this wider base and hardens, anchoring itself securely into the existing concrete.
After I repair a crack, should I seal my entire driveway? Absolutely. Applying a quality concrete sealer over the entire driveway is a fantastic finishing step. It acts like a protective shield, preventing water, oil, and UV rays from damaging the concrete surface. It not only protects your new repair but also helps prevent new cracks from forming in other areas. Plus, it gives the whole driveway a uniform, clean finish, which helps your patch blend in much better.