
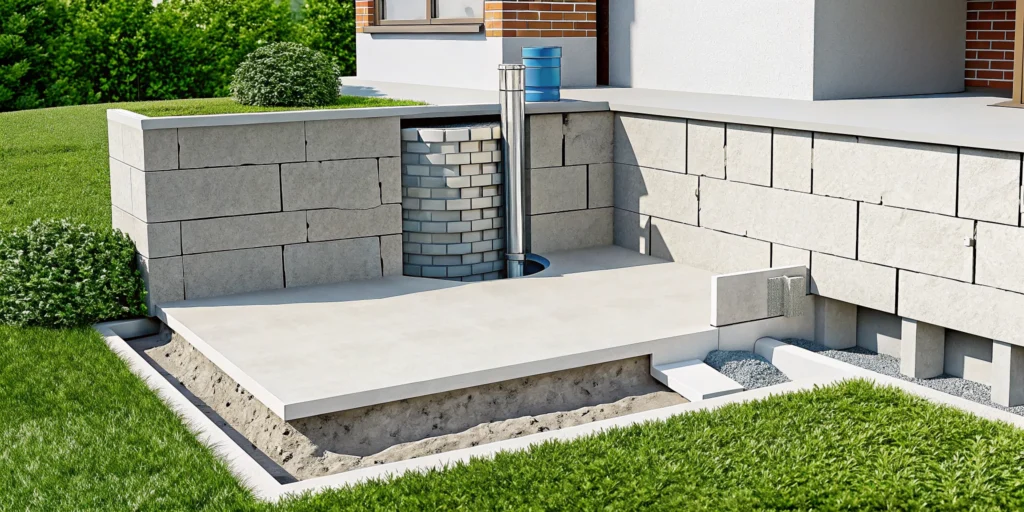
That musty smell in the basement you can’t quite place? Or the peeling paint in the corner you keep meaning to fix? These aren’t just small quirks of an older home; they are often your foundation’s way of telling you it has a water problem. Ignoring these signs can lead to bigger issues like structural damage and unhealthy mold growth. The most effective way to solve this is with a comprehensive solution designed to stop water before it causes harm. This guide will walk you through everything you need to know about professional foundation wall waterproofing, explaining how it protects your home’s structure and creates a dry, healthy space from the ground up.
Key Takeaways
- Early Detection and Simple Maintenance are Key: Your home shows clear signs of water issues, like musty smells or peeling paint, so pay attention. Regular upkeep, including clean gutters and proper yard grading, can prevent many problems before they start.
- Real Waterproofing is a Comprehensive System: A quick coat of sealant is not a permanent fix for active leaks. Effective solutions involve managing water pressure with systems like exterior membranes or interior drainage channels that capture and redirect water away from your foundation.
- Leave Serious Issues to the Professionals: While DIY is fine for basic upkeep, persistent water intrusion requires an expert diagnosis. A professional can identify the root cause of the leak and has the tools and materials to ensure a correct, long-lasting repair, protecting your home’s value.
What Is Foundation Wall Waterproofing?
Let’s talk about foundation wall waterproofing. At its core, it’s a process designed to stop water from getting into your basement or crawl space. Think of it as a complete defense system for the below-ground parts of your home. It works by creating a barrier that blocks water and manages the pressure that builds up in the soil, especially after heavy rains. Keeping this area dry is about more than just avoiding puddles; it’s essential for protecting the structural integrity of your entire home. A proper waterproofing system is a key part of any long-term foundation repair plan, ensuring your home stays dry, healthy, and stable.
Waterproofing vs. Damp Proofing: What’s the Difference?
You might hear the terms “damp proofing” and “waterproofing” used, but they are quite different. Damp proofing is a basic treatment, usually a coating applied to the outside of a foundation wall to block moisture from the soil. It’s a good first step, but it won’t hold up against actual water flow or pressure, and it doesn’t seal existing cracks. Waterproofing, on the other hand, is a much more robust solution. It’s designed to stop both soil moisture and liquid water from getting through your foundation. This often involves applying a specialized membrane and a drainage board to actively manage water away from your home.
Interior vs. Exterior Waterproofing Explained
When it comes to waterproofing, professionals generally approach it from either the inside or the outside. Exterior waterproofing is done on the outside of your foundation, creating a barrier between the wall and the wet soil. This is often the most effective method because it stops water before it can even touch your foundation walls. Interior waterproofing is a different strategy. It’s a system designed to collect and remove water that has already found its way inside. This usually involves an interior drainage system that directs water to a sump pump, which then pumps it out and away from your home. Both methods can be effective and are often used after completing any necessary concrete repair on the walls.
Signs Your Foundation Needs Waterproofing
Your home has ways of telling you when something isn’t right, and your foundation is no exception. Ignoring the early warnings of water intrusion can lead to bigger, more expensive problems down the road, from structural damage to unhealthy living conditions. Think of these signs as your foundation’s cry for help. Water can find its way into your home through tiny cracks, porous concrete, or pressure from saturated soil. The key is to catch it early.
By learning to spot the telltale signs of moisture, you can take action before a small leak becomes a major flood. Pay close attention to any changes in your basement or crawl space. Does it smell different? Are there new stains on the walls? Is the paint starting to peel? These aren’t just minor annoyances; they are clues that your foundation’s defenses have been breached. Understanding what to look for is the first step in protecting your home’s structural integrity and ensuring a safe, dry environment for your family. Below are the most common indicators that your foundation has a water problem and needs professional attention.
Spotting Water Stains, Mineral Deposits, and Peeling Paint
One of the first visual clues you’ll notice is discoloration on your foundation walls. Dark, damp-looking stains indicate that water is actively seeping through the concrete. As this water evaporates, it can leave behind a white, chalky substance called efflorescence. These mineral deposits are a clear sign that moisture has been traveling through your foundation.
You might also see your paint bubbling, peeling, or flaking off the walls. This happens because moisture gets trapped between the concrete and the paint, breaking the bond. If you see any of these signs, it’s not just a cosmetic issue; it’s evidence of a deeper moisture problem that could require concrete repair and waterproofing.
Identifying Mold, Mildew, and Musty Smells
If you walk into your basement or crawl space and are hit with a damp, earthy smell, that’s a major red flag. That musty odor is often caused by mold or mildew, which thrives in damp, dark environments. You may even see it growing on walls, storage boxes, or wooden joists as black, green, or white patches.
Beyond the unpleasant smell, mold can pose serious health risks and compromise your home’s air quality. According to the Environmental Protection Agency, mold exposure can cause allergic reactions and respiratory issues. The presence of mold is a sure sign that your foundation has a persistent moisture problem that needs to be addressed immediately.
Finding Cracks in Your Foundation Walls
While not every tiny crack is a cause for panic, any crack in your foundation is a potential entryway for water. Pay close attention to vertical, horizontal, or stair-step cracks in your concrete or block walls. Water can easily seep through these openings, especially during heavy rain when the soil around your home is saturated.
Think of a crack as an open door for moisture. Even a hairline fracture can widen over time due to hydrostatic pressure, allowing more water to get in. If you spot new or growing cracks, it’s a clear signal that your foundation is under stress and vulnerable to water intrusion. It’s always best to have them inspected to determine if a foundation repair is necessary.
Dealing with Puddles and Dampness in Your Basement
Finding actual puddles of water on your basement floor is the most undeniable sign you have a water problem. This standing water might appear after a storm or seem to show up without a clear cause. You may also notice damp spots on the floor, especially along the edges where the walls meet the floor, or feel a general sense of humidity in the air.
This often happens when the ground becomes oversaturated and hydrostatic pressure forces water up through the concrete slab or through joints in the foundation. While ensuring your gutters and downspouts are directing water away from your home can help, persistent puddles mean it’s time to call in a professional. A proper waterproofing system is often the only way to solve the issue for good, so don’t hesitate to contact us for a free estimate.
The Risks of an Untreated Wet Foundation
Ignoring a little water in your basement might seem harmless, but it’s often a sign of a much bigger problem brewing behind your walls. A wet foundation can lead to a cascade of issues that affect your home’s structural integrity, your family’s health, and your financial investment. Understanding these risks is the first step toward protecting your property for the long haul.
Structural Damage from Water Pressure
When soil around your foundation becomes saturated, it exerts immense pressure on your basement walls. This force, known as hydrostatic pressure, is relentless and pushes inward, searching for any point of weakness. Over time, this constant pressure can cause foundation walls to bow, buckle, and crack. What starts as a hairline fracture can expand, allowing more water to enter and accelerating the damage. Without proper waterproofing to block this moisture, your home’s entire structure is at risk. Eventually, this can lead to the need for significant foundation repair to restore stability.
Mold Growth and Poor Air Quality
A damp, dark basement is the perfect breeding ground for mold and mildew. Once moisture seeps through your foundation, it creates an ideal environment for these fungi to thrive. Mold isn’t just an unsightly stain on the wall; it releases spores into the air that circulate throughout your entire home. According to the Environmental Protection Agency, exposure to mold can trigger allergic reactions, asthma attacks, and other respiratory problems. That musty smell you notice is a clear indicator that your home’s air quality is compromised, turning your personal sanctuary into a potential health hazard.
A Drop in Your Property Value
Foundation problems are one of the biggest red flags for potential homebuyers. A history of water intrusion can drastically reduce your property’s market value and make it incredibly difficult to sell. In fact, water-related issues are a leading cause of construction lawsuits, which highlights how seriously the industry takes moisture damage. Disclosing a wet basement or foundation cracks can scare off buyers or lead to lowball offers. Investing in professional waterproofing is more than just a repair; it’s a crucial step in protecting the value of your home and ensuring a smooth process if you ever decide to sell.
Your Guide to Waterproofing Methods and Materials
When it comes to keeping your foundation dry, there isn’t a one-size-fits-all solution. The right approach depends on your home’s specific issues, its construction, and the soil around it. Think of it like a toolkit, where each tool is designed for a particular job. Some methods stop water on the outside before it can even touch your foundation, while others manage water that finds its way inside. Understanding these different methods and materials will help you have a more informed conversation with a professional and choose the best path forward for protecting your home. Let’s walk through some of the most effective waterproofing solutions available.
Exterior Waterproofing Membranes
This is about creating a shield on the outside of your foundation. Professionals apply a waterproof barrier directly to the exterior walls, stopping water in its tracks before it can seep into the concrete. These membranes can be liquid-applied coatings, like rubberized asphalt that’s sprayed or rolled on, or they can be peel-and-stick sheets that create a seamless layer. Because this method requires excavating the soil around your foundation, it’s a significant undertaking. However, it’s one of the most effective ways to waterproof a home and is a key part of our foundation repair services for comprehensive protection.
Interior Drainage Systems and Sump Pumps
If excavating the outside of your home isn’t practical, an interior drainage system is an excellent solution. This approach manages water that has already passed through the foundation walls. A small channel is installed along the inside edge of your basement floor, collecting any water that seeps in. This water is then directed to a sump pit, where a sump pump automatically pumps it out and away from your house. It’s a highly effective way to keep your basement dry without major exterior disruption. These systems are a reliable defense against hydrostatic pressure and are a popular choice for existing homes.
Crystalline Waterproofing Coatings
This method is pretty fascinating. Instead of just sitting on the surface, crystalline waterproofing becomes part of the concrete itself. When the special coating is applied, it reacts with water and the minerals in the concrete to grow microscopic crystals. These crystals spread through the pores and tiny cracks, permanently blocking the pathways for water. It’s an incredibly durable solution because it won’t peel or wear away over time. We often use this method as part of a larger concrete repair strategy, as it can be applied from the inside to stop moisture from seeping through the foundation walls.
Sealing Cracks with Injection Grouting
When you have a specific, active leak coming through a crack in your foundation, injection grouting is the answer. This is a targeted repair where we fill cracks with a special sealant. Using either low or high pressure, we inject materials like polyurethane foam or epoxy directly into the crack. The material expands to fill the entire void, from front to back, creating a durable and often flexible seal that stops water flow completely. It’s a precise and powerful technique for addressing foundational weak points. You can see examples of how we tackle these kinds of issues in our work gallery.
French Drains and Footing Drains
Managing groundwater before it even reaches your foundation is a smart move. That’s where drainage systems come in. A footing drain, also called weeping tile, is a perforated pipe installed in gravel deep down alongside your foundation’s footing. It collects water at the base of the wall and channels it away, relieving the hydrostatic pressure that can cause leaks and bowing. A French drain works similarly but is typically installed in a shallower trench in your yard to handle surface water. Both are essential tools for homes in areas with poor soil drainage, like many parts of our service area.
Drainage Boards, Dimple Mats, and Sealants
When we install an exterior waterproofing membrane, we often add another layer of protection: a drainage board or dimple mat. This is a semi-rigid plastic sheet with little dimples that creates an air gap against the foundation wall. This simple addition does two important jobs. First, it protects the delicate waterproofing membrane from being damaged by rocks during backfilling. Second, it creates a clear channel for water to flow down to the footing drain, preventing water pressure from building up against the wall. It’s a key component that ensures the entire system works effectively, reflecting the expertise our team brings to every job.
The Waterproofing Process: A Step-by-Step Look
When you hear “foundation waterproofing,” you might picture someone simply painting a thick, black sealant onto a basement wall. While that’s part of it, a professional exterior waterproofing job is a much more involved construction project. It’s a systematic process designed to create a permanent, multi-layered defense against water intrusion. Understanding the steps can help you know what to expect and appreciate why this thorough approach is the most effective way to protect your home.
The process involves excavating the soil around your foundation, repairing any damage, applying several layers of advanced waterproofing materials, and installing a robust drainage system. It’s definitely more intensive than a quick DIY fix, but that’s a good thing. Temporary patches often fail within a few years, leaving you back where you started. A comprehensive, professional waterproofing system, on the other hand, is engineered to address the root causes of water problems, from groundwater pressure to poor surface drainage. It’s an investment that protects your foundation, keeps your basement dry, and preserves your property value for years to come. Our team handles every detail, from the initial assessment to the final cleanup, ensuring the job is done right.
Step 1: Inspecting and Assessing the Foundation
Before any digging begins, the first and most critical step is a thorough inspection. A trained professional will carefully examine your foundation walls, looking for tell-tale signs of water issues like cracks, stains, and mineral deposits (efflorescence). But the assessment goes deeper than that. We also analyze the grading of your property, the condition of the soil, and any signs of hydrostatic pressure building up against the walls. This diagnostic phase is essential because it allows us to understand the unique challenges your property faces. A proper diagnosis ensures we design a targeted, effective solution, which is why we always start with a free estimate to give you a complete picture of your home’s needs.
Step 2: Cleaning and Preparing the Surface
Once a plan is in place, our team carefully excavates the soil around the foundation to fully expose the exterior walls. With the walls accessible, the next task is to prepare the surface for the new waterproofing system. This involves a deep cleaning, typically with a power washer, to remove all dirt, clay, and any old, failing sealant. For modern waterproofing products to create an unbreakable bond with the concrete, the surface must be perfectly clean, dry, and smooth. Think of it like painting a room in your house; you wouldn’t just paint over a dirty, peeling wall and expect a good result. The same principle applies here, and proper preparation is key to a long-lasting seal.
Step 3: Repairing Cracks and Damage
With the foundation walls clean and exposed, we can clearly see and address any damage. Over time, even small hairline cracks can widen and become major entry points for water. During this step, we meticulously fill and seal every crack, hole, and imperfection. Depending on the severity, this might involve using hydraulic cement that expands as it cures to plug active leaks or injecting specialized epoxy to restore the wall’s structural integrity. This isn’t just a cosmetic patch; it’s a crucial foundation repair that ensures the wall is solid and stable before we apply the waterproofing membrane. Sealing a damaged wall without repairing it first is a recipe for failure.
Step 4: Applying the Waterproofing Solution
Now for the main event: applying the waterproofing barrier. A professional job almost always involves a multi-layer system for maximum protection. We typically start by applying a liquid rubber membrane directly to the concrete. This seamless layer adheres to the wall and seals its porous surface, creating a primary waterproof shield. For an even higher level of defense, we then install a dimple board or drainage mat over the liquid membrane. This durable, plastic sheet acts as a second physical barrier and creates a small air gap, which helps channel any water down to the drainage system and relieves hydrostatic pressure. This one-two punch creates a formidable shield against moisture.
Step 5: Installing the Drainage System
A top-tier waterproofing system doesn’t just block water; it actively manages it. After the membrane is applied, we install a new exterior French drain (also called a weeping tile) at the base of your foundation. This system consists of a perforated pipe laid in a trench and surrounded by clean, washed gravel. Its purpose is to collect groundwater that would otherwise press against your foundation walls. The pipe then carries the water safely away from your home, usually to a sump pump system in your basement or to a lower point on your property. This drainage system is the key to relieving hydrostatic pressure, which is the primary force that causes basement leaks and foundation damage.
Step 6: Backfilling and Grading the Area
The final step is to put everything back together. We carefully backfill the excavated trench, first with more gravel to protect the new drainage pipe and then with the original soil. As we fill the trench, we pay close attention to the final grade of the land around your house. The ground should be gently sloped away from the foundation to ensure that rainwater and melting snow flow away from your home, not toward it. This simple but vital detail is your first line of defense against surface water. When you see the finished product, you’ll find a clean site and a well-graded landscape, as shown in examples of our work.
Common Waterproofing Mistakes to Avoid
Waterproofing your foundation is a significant investment in your home’s health and stability. Getting it right the first time is key to preventing future headaches and expenses. Unfortunately, a few common missteps can undermine the entire project, leading to failed barriers and recurring water problems. Whether you’re considering a DIY approach for a minor issue or hiring a professional for a complete overhaul, knowing what not to do is just as important as knowing what to do.
Many of these errors happen because of a simple lack of experience. For example, applying a coating to a dirty wall or choosing the wrong product for your specific water issue can render your efforts useless. These mistakes don’t just waste time and money; they can also allow water to continue seeping in, leading to more significant foundation repair needs down the road. Understanding these potential pitfalls will help you ask the right questions and ensure your foundation gets the protection it truly needs to stay dry and stable for years to come.
Skipping Proper Surface Preparation
Think of waterproofing like painting a room. You wouldn’t just slap a new coat of paint over dirty, peeling walls, right? The same principle applies here, but the stakes are much higher. For any waterproofing material to work, it needs to bond directly with the foundation surface. This means the wall must be completely clean, dry, and smooth. Any dirt, dust, old sealant, or loose material will prevent the new membrane or coating from sticking properly. This creates weak spots where water can easily get through, making your waterproofing effort ineffective from the start. Taking the time to properly prepare the surface is a non-negotiable first step for a successful project.
Choosing Damp Proofing Instead of Waterproofing
This is one of the most common and costly mistakes homeowners make. While the terms sound similar, damp proofing and waterproofing are not the same. Damp proofing involves applying a thin, moisture-resistant coating to stop water vapor from the soil from seeping through the concrete. It’s not designed to block liquid water or withstand hydrostatic pressure (the force of water pushing against your foundation). Waterproofing, on the other hand, creates a complete barrier that keeps both moisture and liquid water out. If your basement has active leaks, puddles, or significant dampness, you need a true waterproofing solution. Opting for damp proofing in this situation is like using a bandage when you really need stitches.
Applying Materials in the Wrong Weather
Most waterproofing products have specific temperature and weather requirements for a reason. Applying them when it’s too cold, too hot, or too damp can seriously compromise their ability to cure and bond correctly. For many materials, the air and surface temperature should be at least 50°F. If the temperature drops too low, the product may not set properly, leading to a weak, ineffective barrier. A professional team understands how temperature and humidity affect different materials and will schedule the work accordingly. This is a critical detail that ensures the longevity and performance of your waterproofing system, and it’s one that is often overlooked in DIY projects.
Using Improper Backfilling and Grading Techniques
Once the waterproofing membrane is applied, the job isn’t over. The process of backfilling, or refilling the excavated soil around the foundation, must be done carefully. Dumping soil mixed with sharp rocks, construction debris, or using heavy machinery too close to the wall can easily puncture or tear the new waterproof barrier you just installed. Professionals often use a protection board to shield the membrane during this step. Afterward, the ground around your home should be graded to slope away from the foundation. Proper grading helps direct rainwater away, reducing the amount of water that collects against your foundation walls in the first place. You can see examples of our careful, professional process on our work page.
A Closer Look at Interior Waterproofing Solutions
When you can’t stop water from the outside, the next best thing is to manage it effectively on the inside. That’s where interior waterproofing solutions come in. These systems are designed to collect and redirect any water that makes its way into your basement or crawl space, keeping your home dry, safe, and comfortable. Think of it as a highly effective water management plan for the inside of your foundation, protecting your home from the bottom up. This approach is especially useful when exterior excavation isn’t practical due to landscaping, patios, or attached garages.
Instead of creating a barrier on the outside walls, interior methods work by capturing water at its most common entry points, like the joint where the floor meets the walls. From there, the system channels the water to a designated spot and pumps it safely away from your home. This strategy is a powerful way to deal with hydrostatic pressure (the force of groundwater pushing against your foundation) and persistent water intrusion. By installing an interior system, you can transform a damp, musty basement into a usable and healthy part of your home. Let’s look at the key components that make up a typical interior system: the sump pump and the drainage channels that feed it.
Sump Pumps and Dehumidifiers
A sump pump is the heart of most interior waterproofing systems. It’s a small pump installed in a basin, or pit, at the lowest point of your basement or crawl space. When water from the drainage system or ground fills the basin, a float switch activates the pump, which then pushes the water out of your home through a pipe. It’s your first line of defense against flooding during heavy rains. To keep it working reliably, it’s a good idea to test your sump pump regularly. While a sump pump handles liquid water, a dehumidifier tackles moisture in the air. Basements are naturally damp, and this excess humidity can lead to mold, musty odors, and poor air quality. A dehumidifier pulls moisture from the air, helping to keep the space dry and healthy.
Interior Drainage Channels
Interior drainage channels, sometimes called French drains, are the workhorses that collect water and deliver it to the sump pump. We install these channels by creating a small trench along the inside perimeter of your basement floor, right next to the foundation walls. A perforated pipe is placed in the trench and surrounded by gravel, which is then covered with fresh concrete, leaving a small gap at the wall to catch water. Any water that seeps through the walls or up from under the floor flows into this channel and is directed straight to the sump pump. This interior drainage system effectively captures water before it can ever reach your basement floor, preventing puddles and widespread water damage.
DIY vs. Professional Waterproofing: How to Decide
When you spot signs of moisture in your basement, your first thought might be about tackling the problem yourself. It’s tempting to try and save money with a DIY fix, and for some very minor issues, that might be a viable path. However, foundation waterproofing is a complex job where a small mistake can lead to much bigger, more expensive problems down the road. The key is to honestly assess the scope of the issue and your own skill level before you start digging or buying materials.
Deciding between a weekend project and calling in a pro comes down to understanding the difference between simple preventative measures and a true waterproofing solution. One involves a bit of yard work and sealant, while the other requires excavation, specialized materials, and a deep understanding of how water interacts with your home’s structure. A DIY approach might patch a symptom, but a professional diagnosis gets to the root cause of the water intrusion. This is especially true in the Dallas area, where expansive clay soil can put unique pressures on a foundation. Before you commit to a path, it’s helpful to know what you’re up against. Let’s break down when you might handle it yourself and when it’s time to contact a professional.
When a DIY Approach Might Work
A DIY approach can be effective for minor, preventative tasks. If you’re not dealing with active leaks or major cracks, some simple steps can make a big difference. Start by checking your home’s exterior. Often, water problems can be improved by simply cleaning your gutters, extending your downspouts away from the foundation, and improving the grading of the soil so it slopes away from your house. For very small, hairline cracks that aren’t getting worse, you might consider applying a waterproof sealant yourself. If you go this route, it’s critical to follow the product instructions exactly. The surface must be perfectly clean and dry for the sealant to bond correctly. These small fixes are best for prevention, not for solving an existing water intrusion problem.
Why It Pays to Call a Professional
If you have water actively seeping into your basement, visible cracks growing larger, or a persistent musty smell, it’s time to call a professional. Foundation waterproofing is a skilled trade for a reason. A pro can accurately diagnose the source of the water, which is something a DIY effort can easily miss. The issue might not be a simple crack but significant hydrostatic pressure requiring a comprehensive foundation repair strategy. Professionals have the equipment and expertise to handle the job safely and effectively, from excavation to applying commercial-grade materials that aren’t available in stores. They understand that proper surface preparation is everything and can implement complex interior or exterior drainage systems. Most importantly, a reputable company provides a warranty for their work, giving you peace of mind that the job was done right.
How to Maintain Your Waterproofed Foundation
Once your foundation is waterproofed, you’ve made a huge investment in protecting your home. But the work doesn’t stop there. Think of it like any other major home system; it needs a little upkeep to perform its best for years to come. Consistent maintenance ensures your waterproofing solution continues to shield your home from water damage, preserving its structural integrity and keeping your basement dry.
Thankfully, maintaining your waterproofed foundation isn’t complicated. It mostly involves being mindful of how water behaves around your property and taking a few proactive steps throughout the year. From keeping your gutters clean to scheduling periodic check-ups, these simple habits can prevent small issues from turning into major headaches. By staying on top of these tasks, you can extend the life of your waterproofing system and ensure your home remains a safe, stable, and healthy environment.
Manage Gutters, Downspouts, and Grading
One of the most effective ways to protect your foundation is to control water at its source. Your gutters and downspouts are your first line of defense. Make sure you clean them out every spring and fall to prevent clogs that can cause water to overflow and pool right next to your foundation. Downspouts should extend at least five feet away from your house, directing water to an area where it can safely drain. Sometimes, simply fixing grading and downspout issues can solve the majority of water problems without needing more extensive foundation repair. The ground around your home should always slope away from the foundation walls, not toward them.
Plan Your Landscaping Carefully
Your beautiful garden could be putting your foundation at risk if it’s not planned with water in mind. When planting trees and shrubs, choose species with non-aggressive root systems and place them a safe distance from your home to prevent roots from damaging the waterproofing membrane. If you’re building raised flower beds against the house, ensure they don’t trap moisture against the foundation walls or cover up important drainage components. Any protective panels or landscaping features you add should work with your waterproofing system, not against it. Thoughtful landscaping can complement your drainage efforts and help keep your foundation dry.
Keep Your Drainage System Clear
Exterior drainage systems like French drains are fantastic for channeling water away from your foundation, but they can get clogged with silt, leaves, and roots over time. If your system was installed with cleanout ports, which are capped pipes that come up to ground level, you can use them for periodic inspections. A simple check can tell you if the system is flowing freely. If you notice water backing up or the ground nearby becoming soggy, it might be time for a professional cleaning. Keeping your drainage system clear is essential for it to do its job and prevent hydrostatic pressure from building up against your foundation walls.
Know When to Reapply Coatings
Waterproofing coatings and sealants on your foundation walls aren’t permanent. Over time, they can wear down due to constant exposure to moisture and soil. Keep an eye out for any signs of deterioration, such as peeling, bubbling, or a chalky residue on the surface. It’s critical to only apply new waterproofing products to concrete that is completely dry. Applying a coating to a damp surface can trap moisture underneath, causing the new layer to fail and potentially making the problem worse. If you’re unsure about the condition of your sealant, a professional can assess it for you.
Schedule Regular Professional Inspections
Even with diligent maintenance, it’s a smart idea to have a professional look at your foundation every few years. An expert can identify subtle signs of trouble that are easy to miss, like hairline cracks or early signs of drainage failure. Foundation waterproofing is a skilled job, and a trained eye can spot potential issues before they become costly structural problems. Scheduling a regular inspection, especially after a period of heavy rain or unusual weather, gives you peace of mind. You can contact us to get a professional assessment and ensure your home’s foundation is still in great shape.
Related Articles
- Foundation Crack Repair: A DIY vs. Pro Guide
- Ultimate Guide to Foundation Repair Options
- How to Fill Large Cracks in Concrete Like a Pro
Frequently Asked Questions
My basement only gets a little damp after heavy rain. Is that serious enough for waterproofing? Even a small amount of dampness is a sign that your foundation has a weak point where water can get in. Think of it as a warning signal. That small entry point can be forced wider over time by water pressure, leading to more significant leaks, mold growth, and potential structural issues. Addressing it now, while it seems minor, is the best way to prevent a much larger and more expensive problem later on.
How long does a professional waterproofing system typically last? A professionally installed waterproofing system is designed to be a long-term, durable solution. Unlike temporary patches or DIY coatings that might fail in a few years, a comprehensive system using high-quality membranes and proper drainage is meant to last for decades. When properly maintained, it can protect your home for the life of the structure, making it a lasting investment in your property’s health and value.
Will waterproofing also fix the cracks I see in my foundation walls? Yes, addressing existing damage is a critical part of the professional waterproofing process. Before any waterproofing membrane is applied, a professional team will thoroughly clean the foundation walls and repair all cracks and holes. This step ensures the wall is stable and creates a smooth, solid surface for the waterproofing materials to bond to, effectively sealing those weak points for good.
Is it better to waterproof from the inside or the outside? Both interior and exterior methods are effective, but they solve the problem in different ways. Exterior waterproofing is often the most complete solution because it stops water before it ever touches your foundation. However, it requires excavating your yard. Interior drainage systems are a fantastic, less disruptive alternative that manage any water that gets through and pumps it away. The best choice really depends on your specific home, the source of the water, and your property’s layout.
I see a white, chalky powder on my basement walls. What is that? That white, chalky substance is called efflorescence. It’s made of mineral salts that are left behind when water seeps through the concrete and then evaporates from the surface. While you can scrub it off, its presence is a definite sign that moisture is traveling through your foundation walls. It’s a clear indicator of an underlying water problem that needs to be addressed.