That crack in your basement wall didn’t just appear out of thin air. It’s a symptom of an underlying issue, and more often than not, the culprit is water. Simply filling the crack without addressing what caused it is like putting a bandage on a problem that needs stitches. The water will just find another way in, creating more cracks and more headaches. A truly effective basement wall crack repair starts with understanding the root cause, whether it’s poor drainage or pressure from the soil. This guide will show you how to identify the source of the problem for a fix that actually lasts.
Key Takeaways
- Decode the type of crack: Not all cracks are equal. Thin, vertical lines often result from normal settling, while horizontal or stair-step cracks indicate serious pressure on your foundation and need a professional assessment.
- Manage water around your foundation: Most cracks are caused by water pressure, so your first line of defense is prevention. Ensure your gutters are clean and your yard slopes away from the house to keep the soil from pushing against your walls.
- Choose the right repair method: A DIY injection kit can fix a small, non-structural leak. However, for any structural red flags like bowing walls or wide, growing cracks, calling a professional is the only way to guarantee a safe and lasting solution.
What’s Causing Those Cracks in Your Basement Walls?
Finding a crack in your basement wall can feel alarming, but don’t panic. Most of the time, these cracks are just a sign that your house is settling into its surroundings. The key is to understand what’s causing them so you can figure out the right fix. The ground beneath and around your home is constantly changing, and your foundation has to deal with it. The main culprits behind those new lines in your concrete are almost always a combination of shifting soil, water pressure, and temperature changes. By figuring out which of these is affecting your home, you’re taking the first and most important step toward a solid solution.
Shifting Soil and Foundation Settling
Your house is heavy, and it rests on soil that can be surprisingly unstable. Over time, all houses settle a bit as they sink into the ground. This is a normal process, but it can cause small cracks to appear. Here in the Dallas area, we have a lot of expansive clay soil, which shrinks dramatically when it’s dry and swells up when it’s wet. This constant movement puts a huge amount of stress on your foundation, leading to cracks. If your home settles unevenly, it can strain the walls and create significant structural issues that require professional foundation repair.
The Problem with Water and Moisture
Water is one of the biggest enemies of a healthy foundation. When it rains heavily or you have poor drainage, water can collect in the soil right next to your basement walls. This creates what’s known as hydrostatic pressure, which is just a technical way of saying the weight of the water is pushing inward on your foundation. This pressure is incredibly powerful and can easily force its way through tiny openings, causing new cracks or making existing ones worse. That’s why simply patching a crack from the inside often fails; the external pressure will just find another way in.
When Temperatures Fluctuate
The weather plays a big role in your foundation’s health. Temperature swings, like the ones we experience here in Texas, cause the soil around your home to expand and contract. During a hot, dry summer, the soil shrinks and pulls away from your foundation, leaving it unsupported. Then, when the rains return, the soil swells back up. This cycle of expansion and contraction can cause the foundation to shift and crack over time. These temperature changes can also directly affect the concrete itself, making it more vulnerable to the constant pressure. Understanding our local climate is key to providing lasting repair solutions.
Is It a Serious Problem? Spotting Structural vs. Non-Structural Cracks
Finding a crack in your basement wall can feel alarming, but take a deep breath. Not every crack signals a catastrophe. The first step is to play detective and figure out if you’re dealing with a minor issue or a sign of a bigger problem. Concrete can crack for many reasons, from normal curing to serious foundation movement. The key is learning to tell the difference between a simple cosmetic flaw and a true structural red flag that needs a professional’s attention.
Distinguishing between these types of cracks will help you decide if this is a weekend DIY project or if it’s time to call for backup. Let’s look at the clues your walls are giving you so you can make the right call for your home’s health and your peace of mind.
Signs of a Minor, Non-Structural Crack
Most of the time, a thin, vertical crack is just a sign that your concrete is doing what concrete does: shrinking and settling as it cures. These are often called hairline cracks, and they typically don’t threaten your home’s structural integrity. If the crack is vertical (straight up and down) and less than a quarter-inch wide, it’s usually not a major concern. While many of these smaller cracks can be repaired by homeowners to prevent moisture from seeping in, you should still keep an eye on them. If you notice the crack getting wider or longer over time, it might be pointing to an underlying issue that needs a closer look.
Warning Signs of a Major Structural Problem
This is where you need to pay close attention. If you see horizontal or stair-step cracks in your concrete block wall, it’s a serious warning sign. These types of cracks often indicate that outside pressure from soil and water is causing the wall to fail. A wall that is bowing or bulging inward is another significant concern that requires immediate professional help. While it might be tempting to patch these with a quick-fix product, a simple DIY repair often won’t last. For example, pushing hydraulic cement into a crack from the inside usually fails because of the strong water pressure pushing from the outside. A lasting fix often requires professional foundation repair to address the root cause of the pressure.
What Your Cracks Are Telling You
Think of cracks as your foundation’s way of communicating. They’re telling you a story about what’s happening in and around your home, from normal settling to more serious structural stress. Learning to read these signs is the first step in figuring out your next move. Is this a simple weekend fix, or is it time to call for backup? Let’s break down the four main types of cracks you might find and what each one is trying to tell you.
Vertical Cracks
Vertical cracks run straight up and down your wall and are the most common type you’ll see. Most of the time, they’re caused by the concrete shrinking as it cures, which is a totally normal process. If the crack is narrow and isn’t getting wider, it’s usually not a structural concern. You can often repair these yourself to prevent moisture from seeping in. However, if you notice a vertical crack is widening over time or one side of the crack is higher than the other, it could signal a deeper issue. That’s your cue to get a professional foundation repair assessment.
Horizontal Cracks
If you spot a horizontal crack running across your basement wall, pay close attention. This is a major red flag. Horizontal cracks are almost always caused by intense external pressure pushing against your foundation. This pressure can come from hydrostatic (water) pressure in the soil or from the expansion and contraction of clay soils, a common issue here in the Dallas area. This force can cause your walls to bow inward, leading to serious structural failure. A horizontal crack is not a DIY project; it’s a clear sign that you need to call a structural expert right away to assess the stability of your foundation.
Diagonal Cracks
Diagonal cracks, which run at an angle on your foundation walls, usually point to differential settlement. This means one part of your foundation is sinking or settling at a different rate than the rest. This can happen for a variety of reasons, from soil erosion to poor drainage around your home. A narrow diagonal crack might not be an immediate emergency, but if it’s wider than a quarter-inch or continues to grow, it indicates ongoing movement. This type of problem requires a professional to diagnose the underlying cause and recommend the right concrete repair solution to stabilize your home.
Stair-Step Cracks
Stair-step cracks look just like their name suggests, following the mortar joints between concrete blocks in a step-like pattern. Much like diagonal cracks, they are a classic sign of foundation settlement or bowing walls. You’ll see them in basements built with concrete blocks or bricks. When the foundation moves, the stress causes the mortar joints, which are the weakest points, to crack. Seeing these cracks means your foundation is under significant stress. It’s essential to have a professional evaluate the situation, and you can contact us for a free estimate to get a clear picture of what’s going on.
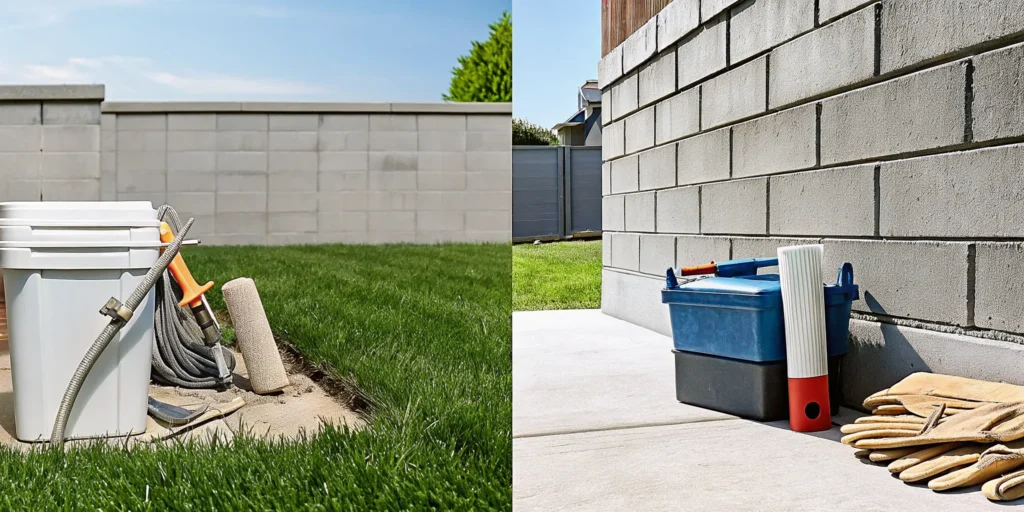
Gather Your Tools and Gear
Before you start any home project, getting your supplies in order is a must. Repairing a basement crack is no different. Having the right tools and materials on hand not only makes the job go smoother but also ensures the repair is effective and long-lasting. Think of it like cooking a new recipe; you wouldn’t start without all your ingredients measured and ready. This is especially true when you’re dealing with something as important as your home’s foundation. A little preparation goes a long way in preventing a small crack from becoming a big headache. We’ll walk through the essential items for your toolkit and, just as importantly, how to stay safe while you work.
Your DIY Repair Toolkit
For a successful DIY repair, you’ll need more than just the sealant. Start with prep tools: a wire brush, a chisel and hammer, and a shop vacuum to clear away any loose or crumbling concrete from inside the crack. A clean surface is critical for a strong bond. Your main repair materials will likely be an injection kit containing either polyurethane foam or epoxy. Expanding polyurethane foam is excellent for stopping active water leaks because it creates a flexible, watertight seal. High-strength epoxy, on the other hand, is used to structurally bond the concrete, though it’s more rigid. Your choice will depend on the type of crack you’re fixing.
Staying Safe During the Repair
The most important part of any DIY project is knowing your limits. While many small cracks are fixable, some are red flags for serious structural issues. If you see horizontal or stair-step cracks, walls that are bowing inward, or any crack wider than a quarter-inch, stop and call a professional. These signs can point to significant problems that require expert foundation repair. It’s always better to get an expert opinion for these types of issues. Before you begin any repair, also make sure water isn’t pooling around your foundation outside. Addressing drainage problems first can prevent the crack from returning. And of course, always wear safety glasses and gloves.
Choosing Your Repair Method: Epoxy vs. Polyurethane
Once you’ve identified the crack you’re dealing with, it’s time to pick your repair material. The two most common and effective solutions for DIY injection are epoxy and polyurethane foam. Think of them as two different tools for two different jobs. Your choice will depend entirely on whether the crack is structural or just a leak, and whether it’s dry or actively wet.
Choosing the right one is the most critical step in a successful repair. Using a structural epoxy on a simple leak might be overkill, while using a flexible sealant on a serious structural crack won’t solve the underlying problem. Let’s look at the strengths of each method so you can make the right call for your basement.
The Case for Epoxy Injection
Epoxy injection is all about strength. If you have a crack that you suspect is structural, epoxy is designed to essentially glue the concrete back together, restoring its original integrity. The high-strength resin fills the crack and hardens into a material that is often stronger than the concrete itself. This makes it an excellent choice for repairing cracks in foundations that need to be structurally sound.
However, this strength comes with a trade-off: rigidity. Epoxy cures into a solid, inflexible bond. If your foundation is still experiencing slight shifts or movement, this rigidity can sometimes lead to new cracks forming nearby. For true structural issues, a professional foundation repair is often the safest bet to address the root cause of the movement.
Why Choose Polyurethane Foam?
If your main goal is to stop water from seeping through a crack, polyurethane foam is your best friend. When injected, this foam expands dramatically to fill every nook and cranny of the crack from the inside out. As it cures, it forms a flexible, waterproof seal that acts like a permanent gasket within the wall.
This flexibility is polyurethane’s key advantage. It can accommodate the natural expansion and contraction of the concrete as temperatures change, as well as minor foundation movement, without breaking the seal. This makes it the preferred method for stopping active leaks in poured concrete walls and ensuring your basement stays dry. It’s a reliable solution for many of the concrete repair issues homeowners face.
Using Hydraulic Cement for Active Leaks
You might see hydraulic cement at the hardware store and think it’s a quick fix for a leaking crack. This material is designed to set very quickly, even underwater, which makes it seem perfect for plugging an active leak. You can simply mix it and push it into the crack to stop the flow of water.
The problem is that this is often a temporary patch, not a permanent solution. Hydraulic cement doesn’t bond well inside the crack and can’t stand up to strong hydrostatic pressure, which is the force of groundwater pushing against your foundation from the outside. Water is persistent, and it will often find a way around or through a simple cement plug. It doesn’t offer the deep, flexible seal that an injection provides.
Using Surface Sealants for Minor Cracks
For very small, non-leaking hairline cracks, you might be tempted to just cover them with a surface-applied sealant or paste. These products are easy to apply, working like caulk to cover the crack on the interior wall. They can be a decent cosmetic fix if the crack is purely superficial and you just want to improve the wall’s appearance.
However, these sealants do nothing to fill the crack’s depth. They are simply a bandage on the surface. If the crack ever starts to leak or widen, a surface sealant will quickly fail. For any crack that goes through the wall, even if it’s not currently leaking, an injection method is a much more reliable and long-lasting repair.
Comparing Cost and Effectiveness
When you’re weighing your options, cost is always a factor. DIY injection kits for both epoxy and polyurethane can range from $100 to $300, depending on the size of the crack. In contrast, hiring a professional to inject a single crack typically costs between $500 and $1,000. While the DIY price is tempting, it’s important to consider the long-term value.
A professional repair is backed by experience and often includes a warranty, giving you peace of mind that the job is done right. If you’re unsure about the cause of the crack or the right method to use, getting a free estimate from an expert is a wise first step. Many companies also offer financing options to make professional work more accessible.
Your Step-by-Step Guide to a DIY Crack Repair
Ready to roll up your sleeves? If you’ve confirmed you’re dealing with a minor, non-structural crack, you can often handle the repair yourself with the right tools and a bit of patience. Following these steps will help you create a solid, lasting seal to keep moisture out of your basement. Just remember, this guide is for simple fixes. If you find the problem is bigger than you thought or you’re just not comfortable with the process, it’s always best to get a professional opinion. For complex issues, a proper foundation repair is the safest route.
Step 1: Find the Root Cause
Before you patch anything, you need to play detective. A crack is a symptom, not the disease, so finding the underlying cause is key to a permanent fix. Often, the culprit is water building up in the soil outside your basement, which creates what’s known as hydrostatic pressure. This force pushes against your foundation walls, eventually causing them to crack. Check your gutters and downspouts to ensure they’re directing water far away from your foundation. Poor yard drainage can also contribute. By addressing the source of the water, you make it much less likely for new cracks to appear after you’ve finished your repair.
Step 2: Prep the Crack for Repair
Proper preparation is the most important part of the job; skimp here and your repair won’t last. Your goal is to create a clean, solid surface for the repair material to bond to. Start by using a wire brush or a wire wheel attachment on your drill to clean the surface thoroughly. You need to remove all loose concrete, old paint, and dirt from inside and around the crack. Once you’ve scrubbed it clean, use a shop vacuum or a can of compressed air to blow out all the remaining dust and debris. The crack should be completely clean and dry before you move on to the next step.
Step 3: Apply Your Repair Solution
With the crack prepped, it’s time to seal it up. For hairline cracks in a poured concrete wall that are leaking water, injecting expanding polyurethane foam is an excellent DIY-friendly method. You can buy kits that include the foam and injection ports that you glue over the crack. The foam expands to fill the entire depth of the crack, creating a flexible and waterproof barrier that stops leaks in their tracks. If you’re using an epoxy injection kit for a structural repair, the process is similar but uses a different material. Whichever product you choose, read and follow the manufacturer’s instructions carefully for the best results.
Step 4: Finish and Monitor Your Work
After you’ve injected the repair material, you need to give it time to work its magic. Most polyurethane and epoxy products need about 24 hours to fully cure and harden, but check your product’s specific instructions. Once it’s cured, you can snap off or remove any injection ports and use a grinder or putty knife to smooth out the surface for a clean finish. The job isn’t quite done, though. Keep an eye on the repaired area over the next few weeks and after heavy rains to make sure your patch is holding strong and no new moisture is getting through.
What Will This Cost? A Look at Repair Prices
Let’s talk about the bottom line. Seeing a crack in your basement wall is stressful enough without worrying about the repair bill. The cost can vary quite a bit, depending on whether you can tackle it yourself or if you need to call in a professional. For small, hairline cracks that aren’t leaking, a DIY approach might save you some money upfront. You can find repair kits at most home improvement stores, and they’re designed for homeowners to use with relative ease.
However, the DIY route isn’t always the right answer. If you’re looking at a crack that seems more serious, or if you’ve tried a fix that didn’t hold, it’s time to think about hiring a professional. While the initial cost is higher, a professional foundation repair ensures the job is done correctly, preventing more expensive damage down the road. Think of it as an investment in your home’s structural health and your own peace of mind. The key is knowing which path is right for your specific situation.
The Cost of a DIY Fix
If you’ve determined you have a minor, non-structural crack, a DIY repair kit can be a budget-friendly option. These kits typically cost between $100 and $300 and include everything you need, like a urethane or epoxy injection sealant, to fill a crack and stop a small leak. They are designed to be a straightforward solution for homeowners who want to handle a common issue without calling for professional help. While this is an affordable way to address a simple problem, remember that it’s only suitable for the most basic repairs.
When to Budget for a Professional
When a crack is more than just a cosmetic issue, it’s time to budget for a professional. You should call a specialist if you see horizontal or stair-step cracks, walls that are bowing inward, or any crack that is wider than a quarter of an inch. These are often signs of structural problems that a DIY kit simply can’t handle. A professional injection repair for a single crack can cost between $500 and $1,000, but this investment ensures the underlying issue is properly addressed. For a clear picture of what your specific repair might cost, you can always get a free estimate.
What Influences the Final Price?
Several factors determine the final cost of a professional repair. The length, depth, and location of the crack all play a role. A long crack that runs the full height of the wall will naturally cost more to fix than a small one. Additionally, the repair method matters. While interior injections are common, some experts agree that the most permanent solution is to fix the crack from the outside, which involves excavation and is more labor-intensive. Addressing the root cause, such as poor drainage, might also add to the overall project cost but is crucial for preventing future cracks.
Understanding Warranties and Guarantees
When you hire a professional, you’re not just paying for a repair; you’re also paying for expertise and assurance. A reputable company will stand behind its work with a warranty. Don’t hesitate to ask for details about their repair methods and ensure they offer at least a one-year warranty on the fix. This guarantee provides peace of mind that a DIY kit can’t offer. It shows that the company is confident in its solution and is committed to solving your problem for good. Learning about a company and its commitment to quality is a key step in the hiring process.
Common DIY Mistakes to Avoid
Tackling a home repair project yourself can be incredibly satisfying, but when it comes to foundation cracks, a few common mistakes can lead to bigger problems down the road. Even a simple-looking crack can hide a more complex issue. Before you roll up your sleeves, let’s walk through some of the most frequent missteps homeowners make so you can get the job done right the first time or know when it’s time to call for backup. Making a smart choice now will save you a lot of time, money, and stress. After all, the goal is a permanent fix, not a temporary patch that fails in a few months. By avoiding these pitfalls, you’re setting yourself up for a successful repair that truly protects your home.
Don’t Skip the Prep Work
It’s tempting to jump straight to filling the crack, but proper preparation is the most important step for a lasting repair. If you apply your sealant or injection material to a dirty, dusty surface, it simply won’t bond correctly. Think of it like painting a wall without cleaning it first; the paint will just peel away. You need to give the repair material a clean, solid surface to adhere to. Use a wire brush to scrub away any loose concrete, old paint, or debris from inside and around the crack. Then, use a shop vac or a can of compressed air to blow out all the remaining dust. This ensures your repair creates a strong, watertight seal.
Don’t Use the Wrong Product
The aisle at the hardware store can be overwhelming, and grabbing the wrong product is an easy mistake to make. Not all crack fillers are created equal. For instance, if you have an active water leak, an expanding polyurethane foam is often the best choice because it creates a flexible, waterproof seal as it cures. On the other hand, epoxy injections are better suited for providing structural strength. Using a simple caulk or surface sealant on a deep or leaking crack is like putting a bandage on a broken bone. It might look fixed on the surface, but it doesn’t address the underlying issue. Understanding which material is right for your specific crack is key to a successful concrete repair.
Don’t Ignore Water Issues
That crack in your basement wall didn’t appear out of nowhere. More often than not, it’s a symptom of a larger water problem outside your foundation. Before you even think about repairing the crack itself, you have to address the root cause. Is water pooling around your foundation? Are your gutters clogged or your downspouts pointed directly at the base of your house? If you seal a crack without fixing the external water pressure issue, that water will just find another way in, creating new cracks and more headaches. Take a walk around your property and make sure water is being directed away from your home’s foundation.
Don’t DIY a Structural Problem
This is the most important rule of all. While many small, vertical cracks are manageable DIY projects, some cracks are clear warning signs of serious structural failure. If you see horizontal cracks, large diagonal cracks, or stair-step patterns in a block wall, put down your tools. These often indicate that your foundation is under immense pressure and may be starting to bow or fail. Attempting to patch these cracks yourself won’t solve the structural problem. In these situations, you need a foundation specialist to assess the stability of your home. Trying to fix a structural issue on your own can be dangerous and may lead to far more expensive repairs later.
Keep Cracks from Coming Back: A Prevention Plan
Fixing a crack is a great first step, but the real win is making sure new ones don’t show up. Once you’ve addressed the immediate issue, you can shift your focus to prevention. A little proactive care goes a long way in protecting your home’s foundation and giving you peace of mind. Think of it as creating a defensive line for your home against the forces that cause cracks in the first place.
Most preventative measures revolve around one key culprit: water. By managing water and moisture around your foundation, you can dramatically reduce the stress on your basement walls. Here are a few key strategies to add to your home maintenance routine.
Improve Your Yard’s Drainage
One of the most effective things you can do is manage how water behaves in your yard. When rainwater or runoff pools against your foundation, it creates immense pressure. To prevent new cracks from forming, it’s essential to have a drainage system that effectively moves water away from your house. Start with the basics: keep your gutters clean and ensure downspouts extend at least five feet from your home. For more persistent issues, you might need a more robust solution like a French drain or a swale, which are designed to intercept and redirect water before it ever reaches your foundation walls.
Control Soil Moisture
The soil around your home, especially the expansive clay common in the Dallas area, swells when it’s wet and shrinks when it’s dry. This constant movement puts a lot of stress on your foundation. When water builds up outside your basement walls, it creates hydrostatic pressure that pushes inward and can lead to cracks. The goal is to keep the moisture level in the soil around your foundation as consistent as possible. Proper drainage is your first line of defense, but consistent, careful watering during dry spells can also prevent the soil from shrinking and pulling away from the foundation. This balance is key to avoiding future foundation repair.
Consider Basement Waterproofing
While sealing a crack stops a leak in one spot, a comprehensive waterproofing strategy protects your entire basement. Before you even begin a repair, it’s smart to make sure water isn’t accumulating around your foundation. Waterproofing isn’t just about patching holes; it’s a system that can include exterior membranes, interior drainage channels, and sump pumps. This approach addresses moisture from all angles, preventing water from seeping through porous concrete or finding its way into new cracks. If you’re dealing with persistent dampness, it might be time to get a free estimate for a professional waterproofing solution.
Perform Regular Inspections
You don’t have to wait for a puddle on the floor to know you have a problem. Neglecting to fix small cracks can lead to serious water damage and structural problems down the road. Make a habit of inspecting your basement walls a few times a year, especially after heavy rains. Look for new cracks, check if old repairs are still holding, and watch for any signs of moisture or water stains. Catching a small issue early is much easier and less expensive than dealing with a major failure. Seeing examples of our work can help you know what to look for.
Know When to Call a Pro
I love a good DIY project as much as anyone, but when it comes to your home’s foundation, it’s crucial to know your limits. Some jobs go beyond a simple fix and require a professional eye. Ignoring the signs of a bigger problem can lead to more damage and higher costs later. If you see any of the following red flags, it’s time to step back and call in an expert.
If the Crack Is Wide or Growing
A tiny, hairline crack is one thing, but if you’re looking at a crack wider than a quarter of an inch, your foundation is trying to tell you something serious. Even more telling is a crack that is actively growing. Use a pencil to mark the ends of the crack and measure its width, then check back in a few weeks. If the marks have been surpassed or the crack has widened, it’s a clear sign of ongoing movement or pressure. This isn’t just a cosmetic flaw; it’s an active structural issue that needs immediate attention. A growing crack indicates that the forces on your foundation are winning, and a professional foundation repair is necessary to stabilize your home.
If Your Walls Are Bowing or Leaning
Stand back and take a long look at the wall with the crack. Does it appear to be bowing inward or leaning? You can check this by holding a long, straight board against the wall. A visible gap between the board and the wall is a major red flag. Bowing walls are caused by immense external pressure from soil and water, and it’s a sign that your foundation is under significant stress. This is not a problem you can fix with a simple patch kit. It requires a professional assessment to determine the best way to reinforce the wall and relieve the pressure, which is a job for a specialized team.
If Water Keeps Getting In
You’ve patched the crack, you’ve applied sealant, but after every heavy rain, you still find a puddle on your basement floor. A persistent leak is a sure sign that your DIY fix isn’t enough. Water is incredibly persistent, and patching a crack from the inside is often just a temporary bandage. The real problem might be on the exterior, where water is collecting against your foundation and forcing its way through the concrete. Professionals have methods to address the issue at its source. If water keeps finding a way in, it’s time to contact an expert who can provide a permanent solution, not just another patch.
If the Problem Gets Worse Over Time
Pay attention to how your repairs hold up. If a crack you patched reopens, or if new cracks start to appear nearby, it’s a clear signal that you haven’t addressed the root cause. Think of it like this: you’re treating the symptom, but the underlying condition is still there. Foundation problems rarely resolve themselves; they almost always worsen over time. What starts as a small issue can develop into a major structural failure, leading to much more complex and expensive repairs. Seeing how professionals have tackled these kinds of issues in our work can give you an idea of what a real solution looks like. Don’t wait for the problem to escalate.
Related Articles
Frequently Asked Questions
I have a tiny hairline crack. Do I really need to do anything about it? Even small cracks are worth paying attention to. While a very thin, vertical crack is often just a sign of normal concrete curing, it’s still a potential entry point for moisture. The best approach is to monitor it. Take a photo or mark the ends with a pencil to see if it gets any longer or wider over time. If it stays the same, you can seal it with a simple injection kit to prevent future water issues. If it grows, it’s a sign of an active problem that needs a closer look.
Why can’t I just use caulk or paint to cover up the crack? Covering a crack with a surface sealant like caulk or paint is only a cosmetic fix. It does nothing to fill the crack’s depth or stop water pressure from the outside. Think of it as putting a sticker on a hole in a bucket; it might hide the problem for a little while, but it won’t stop the leak. Water will eventually work its way around the patch or push it off entirely. A proper repair involves injecting a material that fills the crack through the entire thickness of the wall.
My crack is horizontal. Is it really that serious? Yes, a horizontal crack is a significant warning sign that requires immediate attention from a professional. This type of crack is almost always caused by intense external pressure from soil or water pushing against your foundation wall. This force can cause the wall to bow inward and eventually fail. It is not a DIY project. A structural expert needs to assess the situation to determine the right way to reinforce the wall and prevent further damage.
I fixed a crack, but it came back. What did I do wrong? If a crack reappears after you’ve repaired it, it usually means the underlying cause was never addressed. The crack itself is just a symptom. The real problem is often excessive water pressure or soil movement outside your foundation. Without fixing the source, like poor drainage or clogged gutters, that pressure will continue to stress your foundation and can reopen old cracks or create new ones. A lasting solution involves both repairing the crack and managing the external forces acting on it.
When is a DIY kit a good idea, and when should I definitely call a professional? A DIY injection kit is a great option for a single, narrow, vertical crack that might be letting in a small amount of moisture. If you’re confident in the prep work and the crack is clearly non-structural, you can often get a good result. However, you should always call a professional if you see horizontal or stair-step cracks, if the wall is bowing, if the crack is wider than a quarter-inch, or if you have persistent water problems despite your best efforts. When it comes to your home’s structural stability, an expert opinion is a wise investment.