
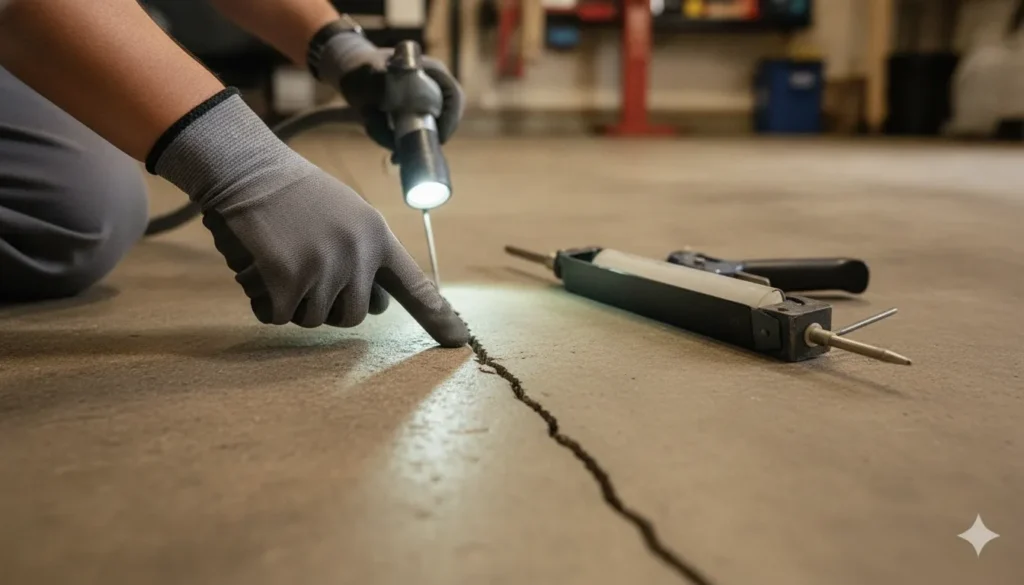
A crack in your concrete floor can be unsettling, especially when it appears inside a garage, sunroom, or utility room. In many DFW homes, the cause begins below the slab: North Texas expansive clay soil shrinks and swells as moisture levels change, which can contribute to foundation movement and floor cracks that show up inside.
To repair cracks in concrete floor surfaces safely, first determine whether the damage is cosmetic or signals movement. Hairline cracks are often cosmetic, while cracks wider than 1/8 inch, deeper cracks, or cracks with shifted edges warrant a professional inspection.
Small, stable cracks may respond well to careful cleaning and sealing, which can help limit moisture infiltration before the sub-base is affected. Before choosing a filler or reaching for a tool, take a close look at the crack’s width, depth, direction, and any nearby changes such as uneven flooring, sticking doors, or gaps around trim. That quick assessment will help you decide whether a straightforward repair is appropriate for your floor, or whether the damage deserves an expert opinion.
Is It Safe to Repair Cracks in a Concrete Floor Yourself?
Finding a crack in your concrete floor can be unsettling, especially when you are unsure whether it signals a larger foundation problem. In many cases, a narrow, stable surface crack is cosmetic and suitable for careful homeowner maintenance. The important distinction is whether the crack remains at the surface or suggests movement through the slab.
Before you repair cracks in a concrete floor, inspect the line in good light and note its width, depth, location, and pattern. A hairline crack that has not changed, has no height difference from one side to the other and does not allow visible moisture through may only require cleaning and sealing. Sealing a small crack can help limit water seepage, which may erode the sub-base and contribute to additional damage over time. For more context, review this guide to understanding why concrete cracks.
When a DIY repair may be reasonable
A cosmetic crack is usually shallow and narrow, with no sign that the slab has shifted. Surface crazing, which appears as fine lines across the top layer, often reflects normal concrete behavior rather than a structural defect. For this type of crack, remove loose debris, clean the area, and use a suitable concrete crack filler according to the product directions. Keep the repaired area dry and observe it over time.
When to stop and request an inspection
Do not treat the crack as a simple cosmetic repair if it is wider than 1/8 inch, becomes deeper, or continues to grow. A crack that appears to penetrate the slab can indicate foundation shifting rather than surface shrinkage. Vertical displacement, where one side sits higher than the other, also calls for professional assessment.
Pay attention to related changes in the room. Sticking doors or windows, uneven flooring, and gaps around trim can occur alongside structural floor cracks. An uneven slab can also create a tripping hazard. If you see these signs, or if the crack changes during observation, pause the DIY project and arrange an evaluation. Sealing the visible line without addressing movement may hide the symptom while the underlying issue continues.
First, Tell a Cosmetic Crack Apart From a Structural One
Finding a crack across your garage, sunroom, or utility-room floor can be unsettling. Many concrete cracks are harmless signs of normal curing and shrinkage, but a few deserve prompt attention. In North Texas, expansive clay soil adds another variable because it shrinks and swells as moisture levels change. That movement can affect both foundations and concrete slabs.
Start with the crack’s width, depth, shape, and movement. No single detail tells the whole story, but the pattern becomes clearer when you inspect several signs together.
Width and depth offer the first clues
A fine, hairline crack that stays narrow and does not change over time is often cosmetic. Concrete naturally loses moisture during curing, and that shrinkage can leave minor surface marks. Shallow surface crazing, which looks like a network of fine lines, generally affects only the top layer rather than the slab’s structural body.
| Feature | Cosmetic hairline crack | Structural concern |
|---|---|---|
| Width | Narrow, less than 1/8 inch, remains stable | Wider than 1/8 inch or continues to widen |
| Depth | Shallow, surface crazing or minor marks | Appears to penetrate the full slab depth |
| Elevation | Both sides level and flush | One side shifts higher or lower |
| Change over time | Stays the same across weeks and seasons | Grows, changes direction, or returns after patching |
| Companion signs | Few or none around the room | Sticking doors, gaps at trim, uneven or sloping floors |
Pay closer attention when a crack measures more than 1/8 inch wide, continues to widen, or appears to penetrate the full slab depth. A through-slab crack can indicate movement below the floor. You may also see moisture entering through the opening, especially after heavy rain or when drainage directs water toward the slab. Sealing a small, stable crack can limit water infiltration, but sealing alone does not correct movement underneath the concrete.
Look for displacement and related movement
Run your hand carefully across both sides of the crack, or place a straightedge nearby. If one side sits higher than the other, the vertical displacement points to slab movement rather than a simple surface defect. Heaving, a sunken edge, or a noticeable ridge can also create an uneven walking surface and a tripping hazard.
Inspect the surrounding room as well. A structural floor crack becomes more concerning when it appears with other changes in the home, including:
- Doors or windows that stick when they previously opened normally
- Gaps forming around baseboards, trim, or interior wall joints
- Uneven floors or a slope that you can feel while walking
- Cracks that radiate from corners or follow columns and other load-bearing features
- A visible change in the crack’s width or elevation over several weeks
These signs do not automatically identify the cause, but together they justify a professional structural assessment. For more context, review the signs your concrete slab needs leveling. Photograph the crack beside a ruler, note its location, and check it again after significant weather changes. If it widens or shifts vertically, especially in a DFW home. Treat that change as a reason to have the slab and supporting soil evaluated before choosing a repair method.
How to Repair Cracks in Concrete Floor: A Simple DIY Guide
A small, stable crack can be frustrating, especially when North Texas soil is already a concern. Expansive clay shrinks and swells as moisture levels change, which can contribute to movement beneath a concrete floor. If the crack is hairline, remains level, and shows no signs of widening, a careful surface repair may help seal out moisture while you monitor it. Cracks that widen, deepen, or shift vertically call for a professional inspection rather than a cosmetic patch.
Before you begin, confirm that the crack is appropriate for a DIY repair. Wear eye protection and gloves, keep the area dry, and choose a patching product labeled for the floor’s location and intended use. For guidance on related surface deterioration, see repairing spalling and surface concrete damage.
- Clean the crack thoroughly. Remove dust, paint, grease, and loose material with a stiff wire brush or vacuum. A clean surface gives the repair compound room to bond with sound concrete. If moisture is entering through the opening, address the water source first and allow the slab to dry. Sealing a small crack can help prevent water seepage from eroding the sub-base and worsening damage.
- Open the crack into a shallow V-shape. Use a cold chisel and hammer carefully, or follow the product instructions for the recommended preparation tool. Widen the top slightly so the patch can lock into the concrete instead of sitting as a thin film over the opening. Remove every loose chip and vacuum again. Stop and reassess if the crack penetrates the slab, has a height difference, or reveals active movement.
- Fill excessive depth before applying the surface repair. Deep cracks require more support than a single layer of patching compound can provide. Insert a compatible backer rod below the surface, leaving the manufacturer’s recommended depth for the sealant. If the product calls for a solid fill instead, pack the approved material in layers and allow each layer to set. Do not force rigid filler into a joint designed to move.
- Apply the matching concrete patch or epoxy. Select a flexible crack sealant for a joint or a suitable concrete patch for a stable, non-moving crack. Epoxy and polyurethane systems can seal and bond concrete cracks, but injection products and structural repairs often require professional application. Work the material fully into the prepared opening, following the label’s mixing ratio, temperature range, and application depth.
- Finish the surface and allow it to cure. Tool or smooth the repair so it sits flush with the surrounding floor. Protect it from traffic, water, temperature swings, and cleaning chemicals for the full curing period. Proper moisture retention during curing reduces the risk of early shrinkage cracking in concrete repairs, a concern the U.S. National Institute of Standards and Technology identifies as central to high-performance concrete durability (early-age cracking review). Keep the area undisturbed for the product’s stated time, then inspect the repair periodically, particularly after significant rain or dry weather.
A patch can close a cosmetic opening, but it cannot correct movement caused by expansive clay or compromised support. If the floor becomes uneven, the crack changes, or doors and windows begin sticking, arrange a professional assessment before applying another layer of filler.
Which Concrete Crack Filler Should You Use?
Choosing a filler starts with the crack’s behavior, depth, and location. A hairline crack that stays stable on an interior floor calls for a different material than a deep opening in a garage slab. North Texas homes also experience expansive clay soil that shrinks and swells as moisture changes. So watch the crack over time before treating it as a purely cosmetic defect.
For small, stable cracks with minor movement, use a flexible polyurethane sealant or a self-leveling concrete crack sealant. These materials can accommodate slight expansion and contraction rather than becoming rigid and breaking away. A self-leveling formula works well where you want the material to settle into a narrow floor crack with minimal tooling. Follow the product instructions for surface preparation, dryness, and curing.
Two-part epoxy is a better fit for a clean, stable crack in a garage or another high-traffic area. Epoxy bonds the sides of the crack and creates a durable seal. Professional concrete floor repair commonly uses epoxy or polyurethane injection to seal and stabilize cracks in garage and high-performance floors. Epoxy injection can also restore structural strength by creating a bond that often exceeds the strength of the surrounding concrete. That does not make epoxy a solution for an actively shifting slab. If the crack continues to widen or shows vertical displacement, have the movement assessed before filling it.
- Fast-set hydraulic cement: Consider this for a deep or through crack where water intrusion or a rapid seal is the immediate concern. It sets quickly, so prepare the opening and tools first, then follow the water-mixing directions closely.
- Concrete patching compound: Use this for wider, shallow, cosmetic voids or chipped edges that require a surface rebuild. It is generally more appropriate for filling missing material than for sealing a narrow moving crack.
Clean the crack thoroughly before applying any filler, and avoid covering signs of movement without documenting them first. A filler can seal an opening, but it cannot correct settlement, shifting, or an eroding sub-base. If the floor is uneven or the crack appears alongside sticking doors, wall gaps, or other movement signs, pause the repair and arrange a professional inspection.
When Should You Call a Foundation Professional Instead?
It is understandable to feel concerned when a crack changes or appears alongside other movement in your home. A small, stable hairline crack may be cosmetic, but a crack that widens, deepens, or shifts deserves closer attention. In North Texas, expansive clay soil shrinks and swells as moisture levels change. That movement can affect the slab and the foundation supporting your home, so the pattern and progression matter.
Consider scheduling an on-site assessment if you notice any of these signs:
- The crack continues to widen or deepen. A crack that grows over time may indicate ongoing movement rather than ordinary surface shrinkage. Cracks that penetrate through the slab can point to foundation shifting.
- The concrete has vertical displacement. If one side of the crack sits higher than the other, the slab may be heaving or settling. Uneven surfaces can also create a tripping hazard.
- The crack follows a concerning pattern. Cracks that radiate from corners, follow columns, or appear near a foundation wall or load-bearing area can offer clues about where stress is moving through the structure.
- Other parts of the home show movement. Sticking doors or windows, gaps around trim, uneven floors, and sloping surfaces can strengthen the case for a foundation-related problem. A floor crack paired with these symptoms calls for more than a surface patch.
These signs do not identify the cause by themselves. A professional can examine the crack’s width, depth, direction, elevation change, and location, then compare those observations with the rest of the structure. That broader assessment helps separate a repairable surface issue from movement that may be affecting the sub-grade or foundation.
Early evaluation also protects you from allowing moisture to enter and erode the supporting sub-base. Ignoring a structural crack can give the underlying problem more time to develop and may lead to a larger, more involved repair. For more context, read about how Texas clay soil causes floor cracks.
If the crack is changing, shifting, or accompanied by uneven floors and gaps around trim, pause the DIY repair and arrange a professional inspection. An on-site review gives you a clearer path forward before the damage progresses.
Why Interior Floor Cracks Matter in North Texas Homes
A crack across a garage, sunroom, or utility-room floor can be unsettling, especially when it appears without an obvious impact. In North Texas, the local ground conditions make these cracks worth watching. The region sits on expansive clay soil that shrinks during dry periods and swells when moisture returns. That repeated movement can place stress on foundations and concrete floors.
Concrete also shrinks naturally as it loses moisture during curing. When that shrinkage is not managed, cracks can develop even without a larger foundation problem. The pattern still matters. Cracks radiating from corners, following columns, or appearing in several connected areas can provide clues about where stress is concentrating. For more context, review understanding why concrete cracks.
How local soil movement affects a concrete floor
Expansive clay does not move uniformly across every property. One part of a slab may receive different moisture levels than another because of drainage, shade, landscaping, or seasonal weather. As the supporting soil changes volume, the floor above it can experience movement and stress. A small surface crack may remain stable, but a recurring or changing pattern deserves closer attention.
This is why a North Texas inspection should consider more than the crack itself. Note its location, direction, and whether it appears near walls, corners, or transitions between rooms. Photographing the area and checking it periodically can help you recognize change. A floor that becomes uneven can also create a tripping hazard, so movement should not be dismissed simply because the crack looks narrow.
Prevention starts before the concrete cures
During the original pour, properly spaced and cut control joints give concrete a planned location for shrinkage cracks. They do not prevent every crack, but they help guide movement into less disruptive lines. Proper curing matters just as much. Adequate moisture retention during curing reduces the risk of early-age shrinkage cracking as the slab hardens. Research from the National Institute of Standards and Technology confirms that mix design, placement, finishing, and curing practices all influence early-age cracking (NIST early-age cracking review).
Routine maintenance provides another layer of protection. Include the garage, sunroom, and utility area in a periodic floor inspection. When you find a small, stable crack, sealing it early can help limit moisture seepage that may erode the sub-base. If a crack widens, changes direction, or returns after sealing, document the change instead of repeatedly covering it.
For a deeper explanation of the regional cause, see how Texas clay soil causes floor cracks. Understanding the soil beneath your home helps you choose the right response for the concrete above it.
Frequently Asked Questions
How do you repair cracks in a concrete floor?
Start by removing dust and loose debris, then open the crack slightly into a V-shape so the repair material can bond to sound concrete. Fill it with a compatible concrete repair compound, smooth the surface, and allow it to cure as directed. Sealing a small crack also helps limit moisture infiltration, which can erode the sub-base over time. If the crack continues to widen, inspect the surrounding slab before applying another patch.
Should I use concrete crack filler or epoxy for floor repair?
A flexible crack filler or polyurethane generally suits a minor crack that may experience slight movement. Epoxy creates a rigid bond and can suit a stable crack in a garage or high-traffic floor. The right choice depends on the crack’s depth, movement, moisture exposure, and whether the slab has shifted. A patch can hide the surface while leaving an underlying foundation issue unresolved, so evaluate movement before choosing a product.
How do I prepare a wide or deep crack for repair?
Clean the crack thoroughly with a wire brush and shop vacuum, then remove weak edges and create a sound bonding surface. For a deeper opening, place a compatible backer rod before applying filler so the material does not sink into the void. Do not treat a wide, deepening, or displaced crack as a routine cosmetic repair. Through-slab cracks can indicate movement beneath the floor.
How can I tell if a concrete floor crack is serious?
Pay attention to change over time, vertical displacement, uneven flooring, and companion signs such as sticking doors, windows, or gaps around trim. Hairline surface cracks are often cosmetic, while cracks wider than 1/8 inch or cracks that shift in elevation warrant professional inspection. In DFW, expansive clay soil can shrink and swell as moisture changes, so widening or shifting cracks deserve prompt assessment rather than repeated surface patching.
Ready to schedule your concrete floor inspection?
Cracks can be cosmetic, but widening or shifting may point to movement beneath the slab. A professional inspection can help you understand what you are seeing and choose a practical next step for your DFW home. Schedule a free foundation and concrete floor inspection with Solid Base Foundations, or call (940) 365-4221.