
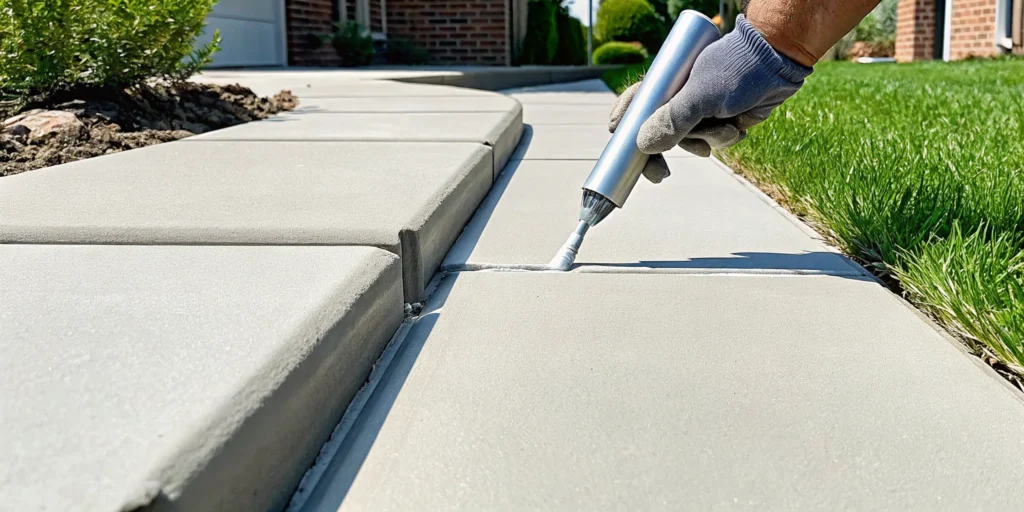
A crack in your concrete is more than just an eyesore; it’s a symptom of an underlying issue. Simply filling it without understanding the root cause is like putting a bandage on a problem that needs stitches. Here in North Texas, the primary cause is often our expansive clay soil, which swells and shrinks with moisture, putting immense stress on foundations and slabs. To find a lasting solution for your cracked concrete, you first need to identify what’s causing the stress. This guide explains the most common reasons concrete fails, what different types of cracks mean, and the proper steps for a repair that actually lasts, so you can address the problem, not just the symptom.
Key Takeaways
- Read the signs: The crack itself tells a story. Thin, hairline cracks are often just cosmetic, but cracks that are wide, growing, or uneven are clear signs of a deeper issue with the soil or foundation that needs a professional look.
- Prep work is non-negotiable: For any DIY repair to last, you must start with a clean slate. Taking the time to clear all loose debris from the crack and choosing the right sealant for the job are the most critical steps for a successful fix.
- Focus on water management for prevention: Water is concrete’s biggest enemy. You can prevent many future cracks by ensuring your gutters and yard grading direct water away from your foundation and by applying a quality sealant every few years to protect the surface.
What Causes Concrete to Crack?
Seeing a new crack appear in your driveway, patio, or foundation can be unsettling. Your mind might jump to the worst-case scenario, but it’s helpful to know that not all cracks signal a major problem. Concrete can crack for several reasons, ranging from a normal part of its drying process to more serious issues with the ground underneath. Understanding what’s causing the crack is the first step to figuring out the right fix.
Think of it like being a detective for your home. By identifying the culprit, you can determine whether you’re dealing with a simple cosmetic issue or a structural problem that needs a professional’s touch. The most common causes of concrete cracks are the natural shrinkage that happens as it cures, a poor initial mix, shifting soil, and excessive weight. Let’s look at each of these so you can get a better idea of what might be happening with your concrete.
Shrinkage as It Cures
Have you ever noticed tiny, web-like cracks on the surface of new concrete? These are often plastic shrinkage cracks, and they’re a perfectly normal part of the curing process. As concrete hardens and dries, the water inside it evaporates, causing the material to shrink slightly. This shrinkage can create small surface cracks, which are usually very shallow and don’t affect the concrete’s structural integrity. While they might not be pretty, these hairline cracks are typically just a cosmetic issue and aren’t a cause for alarm.
Too Much Water in the Mix
The strength of concrete depends heavily on its recipe, specifically the water-to-cement ratio. When too much water is added to the mix, it creates a weaker final product. As all that excess water evaporates during the curing process, it leaves behind more empty space, causing the concrete to shrink more than it should. This excessive shrinkage leads to more significant cracking that can compromise the slab’s durability. This is a common mistake in DIY projects or when working with an inexperienced contractor, highlighting why a proper concrete mix design is so important from the start.
Shifting Ground and Settling
Here in the Dallas area, our soil is a major factor in the health of our foundations and concrete slabs. The expansive clay soil common to North Texas swells when it gets wet and shrinks dramatically when it dries out. This constant movement can cause the ground beneath your concrete to shift, settle, or heave unevenly. When the ground support is no longer stable, it puts immense stress on the rigid concrete slab, leading to significant cracks. If you see cracks that are wider on one end or have one side that is higher than the other, it’s a strong sign that you’re dealing with a foundation repair issue.
Heavy Loads and Traffic
Concrete is strong, but it has its limits. Every concrete slab is designed to support a certain amount of weight. If your driveway was poured to handle standard cars, parking a heavy vehicle like a large moving truck or an RV on it can cause the slab to crack under the pressure. This type of cracking can also happen if the ground, or subgrade, wasn’t properly compacted before the concrete was poured. A weak base can’t provide the necessary support, making the slab vulnerable to cracking even under normal loads. This kind of damage often requires professional concrete repair to restore its strength and function.
What Different Concrete Cracks Mean
Seeing a crack in your concrete can be alarming, but not all cracks signal a disaster. The shape, size, and direction of a crack can tell you a lot about what’s happening beneath the surface. Learning to identify the different types is the first step in understanding whether you have a simple cosmetic issue or a sign of a more serious problem. Think of it as playing detective with your home’s foundation; these clues can help you decide on the right course of action.
Hairline Cracks
Hairline cracks are the most common and least worrisome type you’ll find. They are thin, shallow lines on the surface, often looking like a strand of hair, hence the name. These typically form as new concrete cures and dries, which is a completely normal process. While they are usually just a cosmetic issue, it’s a good idea to keep an eye on them. If you notice them getting wider or longer over time, it could indicate a developing problem. For the most part, though, a few hairline cracks are just part of your concrete’s character and don’t point to structural damage.
Shrinkage Cracks
Shrinkage cracks happen when concrete dries too quickly or the initial mix wasn’t quite right. They often appear as a web of small cracks or as diagonal lines. Unlike hairline cracks, which are purely on the surface, shrinkage cracks can be a bit deeper. They happen because as the water in the concrete mix evaporates, the slab shrinks slightly. If this process is rushed, it creates stress that leads to cracking. While they don’t always mean your foundation is in trouble, they can allow water to seep in, which could cause more damage down the road, especially during freeze-thaw cycles.
Settlement Cracks
If you see cracks that are wider at the top than at the bottom and seem to run continuously along a wall, you are likely looking at settlement cracks. These are a red flag. They happen when the soil beneath your foundation shifts or wasn’t compacted properly before construction. One side of your home may be sinking, causing the foundation to crack under the strain. This is especially common in areas with expansive clay soil, like we have here in Dallas. Settlement issues don’t fix themselves; they require professional foundation repair to stabilize your home and prevent further damage.
Diagonal Cracks
Diagonal cracks that run at an angle on your foundation walls are another sign of uneven ground movement. If the crack is wider at the top, it could be caused by expanding soil or frost heave pushing up on the foundation. If it’s wider at the bottom, it’s more likely due to the ground settling and dropping away on one side. You might see these cracks near the corners of walls or around windows. Because they are almost always related to soil and foundation movement, it’s best to have a professional diagnose the root cause to determine the right repair strategy.
Horizontal Cracks
A horizontal crack in a foundation wall is one of the most serious cracks you can find. These are typically caused by intense pressure from outside the wall. This pressure can come from water-saturated soil, frost, or even heavy equipment operating too close to your home. The force pushes inward on your foundation wall, causing it to bow and eventually crack horizontally. This type of damage compromises the structural integrity of your home and needs immediate attention. A professional will need to assess the situation and recommend a solution, which often involves specialized concrete repair and reinforcement.
Structural Cracks
Structural cracks are any cracks that threaten the stability of your home. While horizontal and large diagonal cracks fall into this category, a general rule is that any crack wider than a quarter of an inch, or one that is actively growing, is a structural concern. You might also see “stair-step” cracks in brick or block walls, which follow the mortar lines. These are clear signs that your foundation is failing. Ignoring them can lead to catastrophic damage, so it’s critical to address them immediately. Stabilizing the foundation is the only way to solve the problem, making professional foundation repair an absolute necessity.
How to Repair Cracked Concrete
Tackling a concrete crack on your own can feel empowering, and for many smaller cracks, it’s a totally manageable weekend project. Following the right steps is key to getting a repair that lasts. This guide will walk you through the process for simple DIY fixes. Remember, if you’re looking at a crack that seems more serious or structural, our professional concrete repair team is always here to help. But if you’ve got a minor crack on your hands, let’s get it fixed.
Step 1: Clean and Prepare the Crack
Think of this as the most important step. A clean, well-prepared surface is the secret to a strong, long-lasting patch. Start by grabbing a hammer and chisel to gently break away any loose or crumbling concrete from the edges of the crack. You want a solid base for your repair material to grip onto. Once you’ve cleared the loose bits, use a wire brush to scrub inside the crack. Finally, blast out all the dust and debris with a leaf blower, shop vac, or a pressure washer for a deep clean. Let it dry completely before moving on.
Step 2: Select the Right Repair Product
The product you choose depends entirely on the type and location of the crack. Walking into a hardware store can be overwhelming, so here’s a quick breakdown of your main options:
- Flexible Concrete Caulk and Sealants: These are great for vertical or horizontal cracks where you expect a little movement. They stay flexible after curing, which helps prevent the crack from reopening. Look for a polyurethane-based product for the best durability.
- Epoxy Injection Kits: For cracks that might be more structural, epoxy is the way to go. This two-part system creates an incredibly strong bond that is often stronger than the concrete itself. Because it involves injecting the material deep into the crack, it’s often a job best left to professionals. If you suspect a structural issue, it’s wise to contact us for a free estimate.
- Cement-Based Patching Compounds: For small, non-moving hairline cracks or chips in your concrete, a simple cement-based patching compound is a good choice. It’s easy to mix and apply, creating a finish that blends well with the surrounding concrete.
- Self-Leveling Masonry Sealants: If you’re repairing a crack on a flat, horizontal surface like a driveway or garage floor, a self-leveling sealant is your best friend. You simply apply it into the crack, and it smooths itself out for a clean, professional-looking finish.
Step 3: Apply the Repair Material
With your crack clean and your product chosen, it’s time for the application. If you’re using a caulk or sealant, load the tube into a caulk gun and apply a steady bead deep into the crack. You want to fill it from the bottom up to avoid air bubbles. For patching compounds, use a putty knife or trowel to press the material firmly into the crack, slightly overfilling it to account for any shrinkage as it dries. If your caulk isn’t self-leveling, you can smooth the bead with a wet finger or a putty knife for a neat finish.
Step 4: Finish and Cure the Repair
Patience is a virtue, especially when it comes to concrete repair. After applying the material, smooth the surface with your trowel or putty knife to match the surrounding area. Now, you have to let it cure. This is when the material hardens and gains its full strength. Each product has a different curing time, so check the manufacturer’s instructions carefully. As a general rule, you should wait at least 24 hours before allowing any foot traffic and even longer for vehicle traffic. Rushing this final step can ruin all your hard work.
Common Concrete Repair Mistakes to Avoid
Even with the right steps, a few common missteps can turn a simple DIY project into a recurring headache. Knowing what not to do is just as important as knowing what to do. If you’re tackling a concrete crack on your own, be sure to steer clear of these mistakes. Getting it right the first time saves you time, money, and frustration down the road. When a repair fails, it’s often because one of these simple but crucial details was overlooked. Let’s walk through the most common pitfalls so you can approach your repair with confidence and achieve a fix that lasts.
Using the Wrong Repair Material
Walking down the hardware store aisle, you’ll see a lot of different products for fixing concrete. It’s easy to assume they all do the same thing, but grabbing the wrong one is a recipe for a failed repair. The type of material you need depends on the crack’s size and location. For small, cosmetic cracks, a simple latex-based filler might work. However, for a stronger and more flexible bond that can handle slight movement, a polyurethane-based sealant is a much better choice. Choosing the right product is critical for a durable fix, which is why a professional concrete repair service is often the best route for ensuring the correct, high-performance materials are used.
Skipping Essential Prep Work
It’s tempting to jump straight to filling the crack, but skipping the prep work is a huge mistake. For any repair material to bond correctly, it needs a clean, solid surface. Think of it like painting a wall; you wouldn’t paint over dirt and expect it to stick. You need to break off any loose or crumbling concrete around the crack with a hammer and chisel. Then, thoroughly clean out all the dust and debris. A wire brush can help dislodge stubborn bits, and a leaf blower or pressure washer will ensure the crack is completely clear. This step is non-negotiable if you want your repair to hold up over time.
Ignoring the Crack’s Full Depth
A crack is often deeper than it appears on the surface. If you only fill the top portion, you’re just putting a bandage on the problem. For cracks deeper than about 3/8 of an inch, you need to address the full depth. A common pro technique is to first fill the bottom of the crack with sand or a foam backer rod. This creates a stable base for the repair material and prevents you from wasting sealant by filling a deep void. This ensures the sealant bonds to the sides of the crack, not the bottom, allowing it to stretch and move without breaking. Properly filling the crack ensures a more permanent and effective repair.
Working in the Wrong Weather
Concrete repair materials are sensitive to temperature and moisture. Applying them in the wrong conditions can seriously compromise the quality of your repair. Most sealants and fillers need to be applied on a dry day when temperatures are moderate, typically between 50 and 100 degrees Fahrenheit. If it’s too cold, the material won’t cure correctly, and if it’s too hot, it can dry too quickly and crack. Here in the Dallas service area, we have plenty of good weather for projects, but always check the forecast and the product label before you start. Working in the right weather gives your repair the best chance of success.
Rushing the Curing Process
After all your hard work, the last thing you want to do is ruin the repair by being impatient. Curing is the chemical process where the repair material hardens and gains its full strength, and it takes time. While it might feel dry to the touch after a few hours, it needs more time to fully set. Most products require at least 24 hours before they can handle foot traffic and even longer for vehicle traffic. Always read the product’s instructions for specific curing times. Rushing this final step can weaken the bond and force you to start the repair all over again. If you’d rather not worry about the details, you can always contact us to handle it for you.
DIY Repair vs. Calling a Pro: What to Do?
Seeing a crack in your concrete can be unsettling. Your first thought might be about how to fix it, and it’s tempting to grab a patching kit from the hardware store and call it a day. While some minor issues are perfect for a weekend DIY project, other cracks are red flags signaling a much deeper problem. Telling the difference is key to protecting your property’s value and safety.
Making the wrong call can be costly. A DIY patch on a structural crack is like putting a bandage on a broken bone; it hides the problem but doesn’t solve it. On the other hand, calling a professional for a tiny surface crack might be unnecessary. This guide will help you assess the situation, so you can decide whether to roll up your sleeves or pick up the phone.
When You Can Likely DIY the Repair
You can probably handle the repair yourself if you’re dealing with minor, hairline cracks. These are typically less than a quarter-inch wide and are often just a normal part of the concrete curing process. A simple way to check is with two quarters; if the crack is narrower than the coins stacked together, it’s likely superficial. These small fissures are usually cosmetic and don’t point to a serious structural issue.
For these jobs, you can find various concrete repair products like sealants and patching compounds that work well. Just be sure to follow the product instructions carefully, especially the part about cleaning the crack before you fill it. Even if you fix it yourself, keep an eye on the area to make sure the crack doesn’t reappear or get bigger.
Signs You Need to Call a Professional
It’s time to call a professional when you see signs that point to a bigger issue than a simple surface crack. If a crack is wider than a quarter-inch, has jagged edges, or is actively growing, it’s a clear warning. Another major red flag is an uneven crack, where one side is higher than the other. This indicates that the ground beneath your slab is shifting, and the concrete is breaking under the stress. A simple patch won’t fix the underlying cause.
These types of cracks often signal problems with soil settlement, water intrusion, or even the structural integrity of your foundation. Ignoring them can lead to more extensive and expensive damage down the road. A professional concrete repair expert can diagnose the root cause and recommend a lasting solution, not just a temporary fix. If you’re ever in doubt, getting a free estimate is the safest bet.
How to Prevent Future Concrete Cracks
After you’ve gone through the trouble of a repair, the last thing you want is for new cracks to appear. While some factors like major ground shifts are out of your control, you can take several proactive steps to protect your concrete surfaces. Prevention is always the best medicine, saving you from future headaches and expenses. By focusing on a few key areas, you can give your concrete driveways, patios, and walkways the best chance at a long, crack-free life. These preventative measures work by addressing the root causes of damage, from water intrusion to the natural behavior of concrete itself.
Ensure Proper Drainage
Water is one of concrete’s biggest enemies. When water pools around or under a concrete slab, it can soften and erode the soil base. In the Dallas area, our clay soils expand and contract dramatically with moisture changes, causing the ground to shift unevenly. This movement puts immense stress on the concrete above, leading to cracks. Proper drainage is crucial to direct water away from your foundation and concrete slabs. Ensure your gutters are clean and that downspouts discharge water several feet away from your home. The ground around your concrete should also be graded to slope away, preventing water from sitting against it.
Use Control Joints and a Quality Mix
If you’re pouring new concrete, starting with the right materials and techniques is essential. Concrete naturally shrinks as it cures, which can create tension and lead to random cracking. Adding control joints is a professional technique to manage this. These are pre-planned grooves cut into the surface that create weakened planes, encouraging the concrete to crack in a straight, predictable line where it’s less noticeable and easier to manage. Additionally, never skimp on the quality of the concrete mix. A mix with the correct ratio of water, cement, and aggregate will be stronger and more durable from the start.
Cure and Seal Your Concrete Correctly
Curing isn’t just about letting concrete dry; it’s a chemical process that gives the slab its strength. Proper curing requires keeping the surface moist and at a consistent temperature for several days after it’s poured. Rushing this process or letting the surface dry out too quickly is a primary cause of weak concrete and surface-level shrinkage cracks. Once cured, applying a quality sealant adds a protective barrier. Sealing your concrete every few years helps shield it from moisture penetration, UV rays, and surface damage, extending its life and keeping it looking its best.
Perform Regular Inspections
Set a reminder to walk around your property once or twice a year to inspect your concrete surfaces. Look for any new, small cracks, especially in your driveway, patio, and walkways. Catching a hairline crack early and filling it with a flexible sealant can prevent water from seeping in, freezing, and turning a tiny issue into a major problem. According to experts, re-sealing them as needed is key to preventing further damage. If you spot a crack that seems to be growing or is accompanied by sinking or unevenness, it’s a sign to call for a professional opinion. We’re always here to provide a free estimate and help you understand what’s going on.
Related Articles
- How to Fill Large Cracks in Concrete Like a Pro
- Foundation Crack Repair: A DIY vs. Pro Guide
- Ultimate Guide to Foundation Repair Options
- Concrete Repair – Solid Base
- A Homeowner’s Guide to Foundation Repair Services
Frequently Asked Questions
Are all concrete cracks a sign of a major problem? Not at all. It’s completely normal to see tiny, web-like hairline cracks, especially in newer concrete. These are usually just a cosmetic result of the material drying and shrinking. The cracks to watch for are the ones that are wide (you can fit a quarter in them), have one side higher than the other, or are actively growing. Those are signs that something more serious, like shifting soil, is happening underneath.
I fixed a crack myself, but it came back. What went wrong? This is a common frustration, and it usually points to one of two things. First, the original repair might not have bonded correctly, which can happen if the crack wasn’t cleaned out completely before being filled. Second, and more likely, the crack is a symptom of a deeper issue. If the ground beneath the slab is still moving, the concrete will continue to crack. A simple patch can’t stop that movement, which is why a professional diagnosis is so important for recurring cracks.
How can I tell if a crack in my driveway is related to a foundation issue? A crack in your driveway or patio can definitely be a clue about your foundation’s health, especially here in North Texas with our active soil. Look for cracks that are uneven, meaning one side is higher than the other. Also, pay attention if the cracks seem to be getting wider or longer over time. If you see these signs in your flatwork, and you also notice issues like sticking doors, cracks in interior drywall, or stair-step cracks in your home’s brick exterior, it’s a strong signal that the problem is with the foundation itself.
Is it worth sealing a brand new driveway or patio? Yes, absolutely. Think of sealant as a protective layer for your investment. After new concrete has had enough time to fully cure (usually about a month), applying a quality sealant is one of the best preventative steps you can take. It helps block water from seeping into the pores of the concrete, which protects it from damage caused by our soil’s expansion and contraction. It also makes the surface easier to clean and helps it resist stains, keeping it looking good for years.
When should I stop trying to fix a crack myself and just call a professional? The moment a crack makes you feel uneasy is a good time to get a professional opinion. You should definitely call for help if a crack is wider than a quarter of an inch, if one side is sinking, or if you see horizontal cracks in your foundation walls. These are not DIY jobs because they point to a structural problem. A simple patch will only hide the issue temporarily. A professional can find the root cause and provide a real solution to protect your home.