
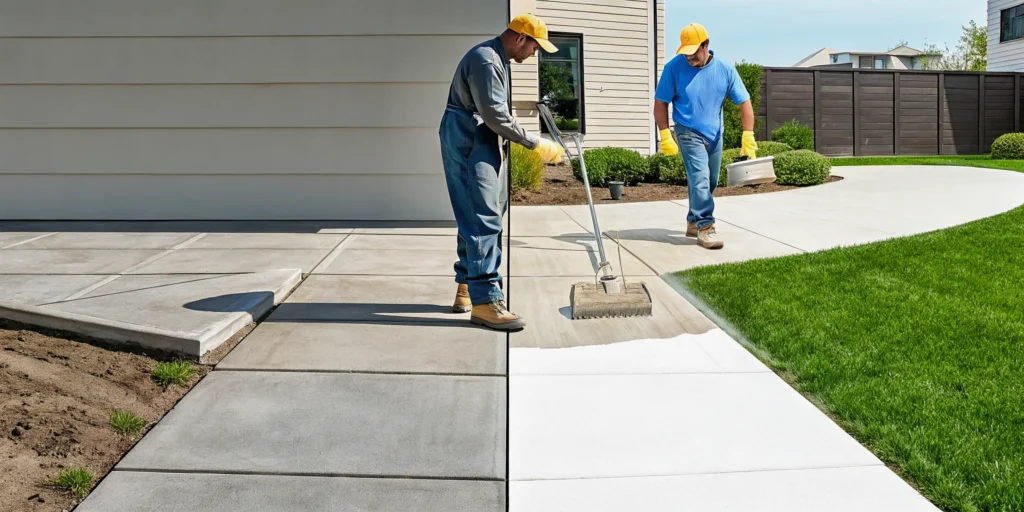
For the hands-on homeowner, a sinking sidewalk might look like the next weekend project. The idea of trying DIY mudjacking concrete to save some money is tempting. But this isn’t like patching a small crack. This repair requires specialized hydraulic equipment and a precise understanding of how to mix and inject the slurry without causing more damage. Pumping the material too quickly can crack the slab, and over-lifting it is an irreversible mistake. Before you rent any equipment, it’s critical to understand the risks involved. We’ll explain why this particular job is almost always better left to experienced professionals who can guarantee a safe and lasting result.
Key Takeaways
- Understand the Materials: Mudjacking uses a heavy, cement-based slurry that can add stress to the soil, while polyjacking uses a lightweight, waterproof foam that stabilizes the ground for a more permanent fix.
- Look Beyond the Initial Price Tag: While mudjacking has a lower upfront cost, it often requires future repairs. Polyjacking is a one-time investment that provides a lasting solution, saving you money and hassle in the long run.
- Leave it to the Professionals: DIY mudjacking is extremely risky and can cause irreversible damage like cracked or over-lifted concrete. A professional has the right equipment and expertise to diagnose the root problem and ensure a precise, stable repair.
What is Mudjacking?
If you have an uneven sidewalk, a sunken patio, or a cracked driveway, you’ve probably heard the term “mudjacking.” It’s a traditional method of concrete repair that lifts and levels sunken concrete slabs. The basic idea is to pump a material, often called a slurry, under the slab to push it back into its original position. A specialized hydraulic pump pushes this mud-like mix into holes drilled through the concrete, creating the pressure needed to raise it. While it’s been used for decades, it’s important to understand how it works and how it compares to newer methods before deciding if it’s the right solution for your home.
The mudjacking process, step-by-step
The mudjacking process is straightforward and methodical. First, a professional crew assesses how much the concrete has sunk to map out a plan. They then drill a pattern of holes, typically about two inches in diameter, into the sunken slab. Next, they prepare the slurry mixture and use a hydraulic pump to carefully inject it into the holes. The team moves from one hole to another, ensuring the slab lifts evenly and without causing new cracks. In some cases, slabs that are stuck together might need to be cut to allow for a smooth lift. Finally, the crew patches the drill holes with grout and can seal any nearby cracks to prevent water from getting underneath the slab in the future.
What’s actually in the “mud”?
The “mud” in mudjacking isn’t what you’d find in your garden. It’s a specific, heavy slurry made from a cement-based mixture. The typical recipe includes a combination of sand, cement, and other materials like limestone dust or topsoil. This blend is mixed with water to create a compound that is fluid enough to be pumped under the concrete but thick enough to create the hydraulic pressure needed to lift it. Once injected, this slurry fills the voids in the soil beneath the slab and hardens, creating a new, solid base to support the concrete. The goal is to create a dense foundation that prevents the slab from sinking again.
Mudjacking vs. polyjacking: The basics
When exploring concrete leveling, you’ll quickly encounter another term: polyjacking. Homeowners comparing PolyLevel vs mudjacking often focus on cure time, hole size, material weight, and long-term durability. This is a more modern alternative, and it’s helpful to know the basic differences. The most visible distinction is the size of the holes required. Mudjacking needs larger holes, around two inches wide, which can be more noticeable after they are patched. Polyjacking uses much smaller holes, often less than an inch wide, resulting in a cleaner finish. Another critical difference is the material’s weight. The mudjacking slurry is heavy, adding about 100 pounds per cubic foot to the soil. Polyurethane foam is extremely light, at only 2 to 4 pounds per cubic foot, so it doesn’t add extra stress to already weak or unstable soil.
Mudjacking vs. Polyjacking: A Head-to-Head Comparison
When you have a sinking or uneven concrete slab, you want a fix that is effective, long-lasting, and fits your budget. Both mudjacking and polyjacking lift and level concrete, but they do it in very different ways. Understanding these differences is key to choosing the right solution for your home, including local Dallas mudjacking alternatives. One method uses a traditional slurry, while the other uses modern polymer foam. Let’s break down how they stack up against each other in the categories that matter most to homeowners. From cost and convenience to durability and appearance, this comparison will help you see why one method has become the industry standard for reliable concrete repair.
Cost: Upfront and long-term
At first glance, mudjacking often appears to be the cheaper option. The initial quote can be lower, which is appealing when you’re trying to manage a budget. However, it’s important to consider the long-term value. Because the mud-like slurry can degrade, wash out, or settle again over time, you could end up paying for the same repair twice. Polyjacking has a higher upfront cost, but it’s a far more permanent solution. The polyurethane foam is waterproof and incredibly durable, meaning it’s a one-and-done repair that often saves you money and headaches down the road. We offer financing options to help make this superior repair method accessible.
Curing time and downtime
How quickly can you get back to using your driveway, patio, or pool deck? With polyjacking, the answer is almost immediately. The polyurethane foam cures and hardens within about 15 to 30 minutes, meaning the surface is ready for foot traffic and even vehicles the same day. This is a huge advantage for busy households. Mudjacking, on the other hand, requires significant patience. The cement slurry needs anywhere from 24 to 72 hours to cure properly. During this time, the area is completely off-limits, which can be a major disruption to your daily routine.
Resistance to water and weather
Water is often the root cause of sinking concrete, so your repair method should be able to stand up to it. Polyjacking foam is hydrophobic, which means it repels water. As it expands, it creates a waterproof barrier under your slab, preventing future erosion and water intrusion. This is a huge benefit for protecting the soil base. The slurry used in mudjacking is not waterproof. It can absorb moisture, and in a worst-case scenario, the material can be washed away by heavy rain or poor drainage, causing the slab to sink all over again.
Appearance and hole size
You want your repaired concrete to look as seamless as possible. Polyjacking is a much less invasive process. We drill a few small, dime-sized holes (about 5/8 of an inch) to inject the foam. These small injection points are easy to patch and blend in with the existing concrete, leaving a clean finish. Mudjacking requires drilling much larger holes, typically one to two inches in diameter, and more of them. These larger holes are more noticeable after they’re patched and can detract from the appearance of your concrete. You can see the clean results of our work on past projects.
Long-term durability
When you invest in a repair, you expect it to last. The polyurethane foam used in polyjacking is lightweight but incredibly strong. It expands to fill every void and chemically bonds with the soil underneath, creating a stable and solid base that won’t break down. This process actually strengthens the ground beneath your slab. Mudjacking slurry is extremely heavy and simply sits on top of the soil. It doesn’t stabilize the ground, and its weight can even contribute to further settling. The slurry can also shrink, crack, and crumble over time, requiring future repairs.
Environmental impact
For homeowners concerned about the environment, polyjacking is the clear winner. The polyurethane foam is made from recycled materials and is environmentally inert. Once cured, it won’t leach any chemicals into the surrounding soil or groundwater. It’s a clean and safe solution for your property. The cement-based slurry used in mudjacking is not only heavy but also not as eco-friendly. The process of manufacturing cement is resource-intensive, and the slurry itself adds a significant amount of weight to soil that may already be unstable, potentially worsening the problem.
The Real Pros and Cons of Mudjacking
Mudjacking has been a go-to method for lifting concrete for decades, and for good reason. It’s a familiar technique that many contractors offer. However, just because it’s an old method doesn’t automatically make it the best one for your home. Like any repair solution, it comes with a distinct set of advantages and disadvantages that are important to weigh before making a decision.
Before you commit, it’s helpful to look past the initial sales pitch and understand what mudjacking can and can’t do for your property long-term. The initial savings might be appealing, but you also need to consider the materials used, the stress on the soil beneath your slab, and how long the repair is likely to last. Let’s break down the real benefits and the often-overlooked drawbacks so you can make an informed choice.
The benefits
The biggest draw for many homeowners is the upfront cost. Mudjacking can be less expensive than other methods, especially for smaller, straightforward jobs. Because it’s been around for so long, it’s a proven technique that gets the job done in the short term. Another plus is that it saves your existing concrete slab. Instead of going through the messy and costly process of demolition and replacement, mudjacking works to lift the concrete you already have. This makes it a less disruptive option for restoring your driveway, patio, or sidewalk without turning your yard into a major construction zone.
The drawbacks and common misconceptions
While the initial cost is low, the long-term value is where mudjacking often falls short. The “mud” is a heavy slurry of soil, cement, and water that adds significant weight to the ground beneath your slab. If the soil was already struggling to provide support, this extra weight can cause it to settle even more over time. Mudjacking is essentially a temporary fix because it doesn’t address the root cause of the problem, like soil erosion or poor compaction. This is why the repair typically only lasts two to five years and often comes without a warranty. The process also requires drilling larger, more noticeable holes in your concrete, which can be an aesthetic downside. It patches the symptom without providing a lasting foundation repair.
How Much Does Mudjacking Cost?
When you’re dealing with a sunken driveway or an uneven patio, cost is understandably a top concern. Mudjacking is often presented as a budget-friendly fix, and while it can be less expensive upfront, the final price tag isn’t one-size-fits-all. The total cost depends on the specifics of your project, like the size of the concrete slab and how much it has sunk. It’s also important to weigh the initial price against the long-term value. Understanding what goes into the cost will help you make a more informed decision for your home and your budget. At Solid Base, we believe in transparency, which is why we offer free, no-obligation estimates to give you a clear picture of the investment required for your specific property.
What affects the final price?
Several key factors determine the final cost of a mudjacking job. The most significant is the size of the area that needs lifting, so a small section of sidewalk will cost less than an entire two-car driveway. The extent of the sinking also plays a big role. A slab that has only dropped an inch requires less material and time than one that has sunk several inches. While the initial quote might seem appealing, it’s crucial to consider the longevity of the repair. As some experts note, “mudjacking is cheaper at first, but because it might not last, you could end up paying to fix it again later.” The slurry used in mudjacking can erode over time, which could cause the slab to sink again.
Is it more affordable than a full replacement?
Yes, absolutely. When compared to the cost of demolishing, removing, and repouring a concrete slab, mudjacking is significantly more affordable. In fact, some studies show that concrete leveling can be up to 70% less expensive than a full replacement. This is because you’re preserving the concrete you already have, saving a tremendous amount on labor and material costs. However, “more affordable” doesn’t always mean “better value.” Many professionals find that “mudjacking is often a short-term fix; concrete lifting is a more permanent solution.” If you’re looking for a lasting repair that addresses the root cause of the problem, it’s worth exploring other concrete repair methods, like polyjacking, which offer greater durability.
DIY Mudjacking: Should You Try It?
The idea of fixing that sunken concrete slab yourself can be tempting. After all, who doesn’t love a good DIY project that saves a little money? But when it comes to mudjacking, this isn’t your average weekend task. It’s a complex process that requires a specific skill set and specialized equipment. Before you start searching for rental gear, it’s important to understand what you’re getting into and why a DIY approach can often create more problems than it solves. Let’s break down the risks and help you decide on the best path forward for your property.
The risks of a DIY approach
While it’s technically possible to perform mudjacking yourself, it’s an incredibly difficult and risky job. The process requires more than just a bag of concrete and a shovel; you need professional-grade equipment like a hydraulic grout pump and a heavy-duty hammer drill. The real challenge, however, lies in the technique. Mixing the slurry to the perfect consistency and pumping it at the right pressure takes practice. Common DIY mistakes include pumping the material too fast, which can crack the slab, or over-lifting the concrete, a costly error that can’t be undone. Even if you avoid those pitfalls, it’s tough to ensure the void beneath the slab is filled completely, meaning the concrete will just sink again.
Why hiring a professional is the safer bet
For most homeowners, hiring a professional for concrete repair is the smarter, safer, and more cost-effective choice in the long run. A trained technician arrives with the right equipment and, more importantly, the experience to get the job done correctly the first time. They understand how to assess the underlying soil, mix the slurry precisely, and lift the slab with control. Think of it this way: you can always add more lifting material, but you can’t take it away once it’s in. Professionals know how to raise the slab slowly and evenly to the perfect height without causing damage. This precision ensures a durable, long-lasting repair that protects your investment.
When to call a concrete expert in the Dallas area
If your sunken concrete is in a high-traffic area like a driveway or patio, a professional repair is essential for safety and durability. This is especially true in the Dallas area, where our expansive clay soil can shift and cause significant foundation and slab issues. A professional can properly diagnose the root cause of the problem, not just treat the symptom. For larger projects or any repair where structural stability is a concern, calling an expert is non-negotiable. A DIY mistake could compromise your property’s integrity and lead to much more expensive repairs down the road. If you’re facing uneven concrete, don’t leave it to chance.
Related Articles
Frequently Asked Questions
Is mudjacking really a permanent solution? While mudjacking can lift your concrete, it’s best viewed as a temporary fix. The slurry material can break down, wash away with rain, or shrink over time, causing the slab to sink again. More importantly, it doesn’t solve the root problem, which is usually weak or eroded soil. The repair often only lasts a few years before you find yourself dealing with the same issue.
If mudjacking is cheaper, why would I choose polyjacking? It’s true that mudjacking often has a lower price tag upfront, but it’s important to think about the long-term value. Because mudjacking is not a permanent fix, you could end up paying for the same repair again in a few years. Polyjacking is a one-and-done solution. The polyurethane foam is waterproof, doesn’t break down, and actually stabilizes the soil beneath the slab, making it a more reliable and cost-effective investment over time.
How long after the repair can I use my patio or driveway? This is one of the biggest differences between the two methods. The slurry used in mudjacking needs a significant amount of time to cure, typically between 24 and 72 hours. During that period, you can’t walk or drive on the surface. With polyjacking, the foam cures in about 15 to 30 minutes, so you can get back to using your space almost immediately.
Will the repair be noticeable? I’m worried about how it will look. Your concern about appearance is completely valid. Mudjacking requires drilling a pattern of large holes, about one to two inches wide, into your concrete. Even when patched, these spots can be quite obvious. Polyjacking is much less invasive. It uses a few dime-sized injection holes that are very easy to patch and blend into the existing concrete, leaving a much cleaner and more seamless finish.
Can mudjacking actually make the problem worse? In some situations, yes. The slurry used in mudjacking is a mix of soil, cement, and other materials, and it’s extremely heavy. If your concrete is sinking because the soil underneath is weak or poorly compacted, adding hundreds of pounds of new material on top of it can cause the ground to settle even further, leading to more sinking in the future.